


Inside This Guide: What You’ll Learn
- My Experience Growing Turmeric and Ginger
- Quick Guide: How to Directly Sow Turmeric and Ginger
- Why I grow Turmeric and Ginger?
- Caring for and Feeding Ginger & Turmeric
- Q & A
- Cultivating Turmeric and Ginger in Zone 9b and Cooler U.S. Climates
- Planting Turmeric and Ginger in Pots or Beds: A Northern California Advantage
- How to Harvest Turmeric and Ginger
- How I Store and Use My Homegrown Turmeric and Ginger
- How to Use Turmeric and Ginger in Cooking
- Marzi’s Homemade Recipes: How I Use My Homegrown Turmeric and Ginger
- My Favorite Ways to Use Fresh Turmeric and Ginger
My Experience Growing Turmeric and Ginger
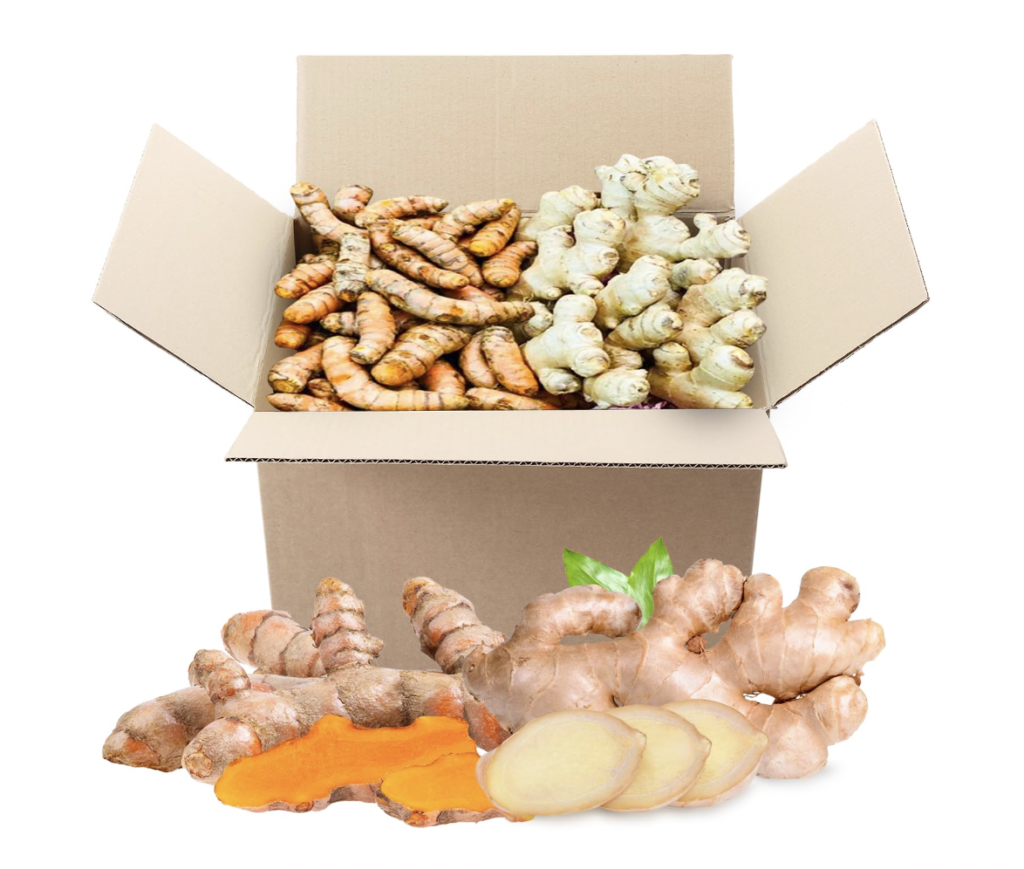
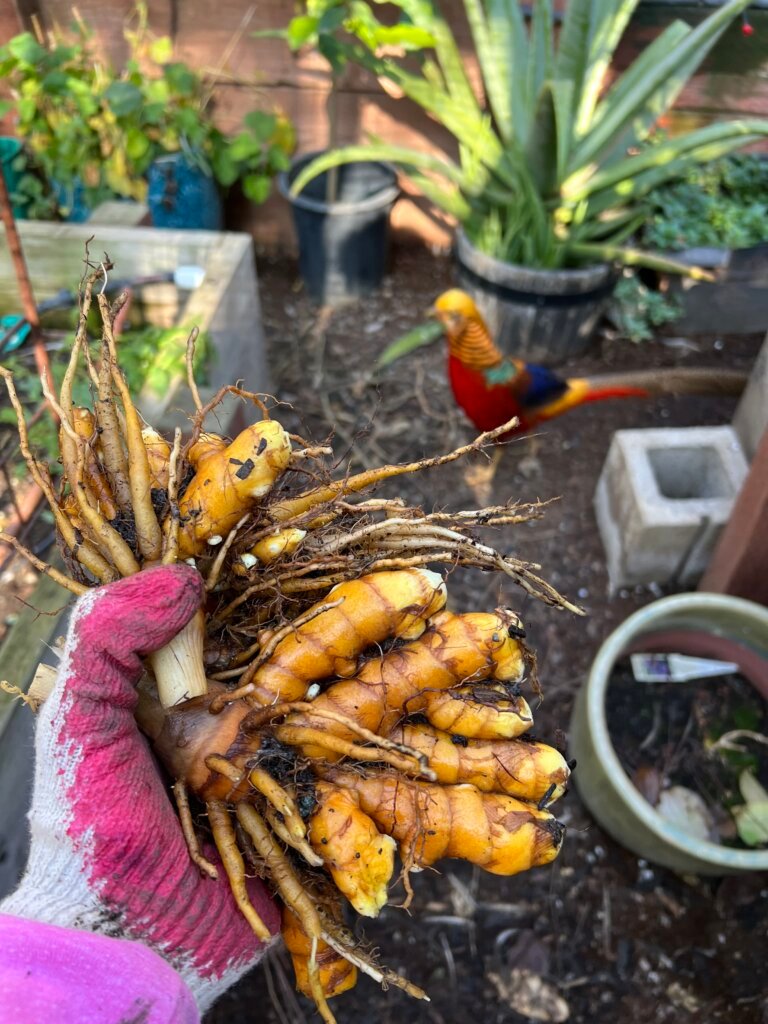
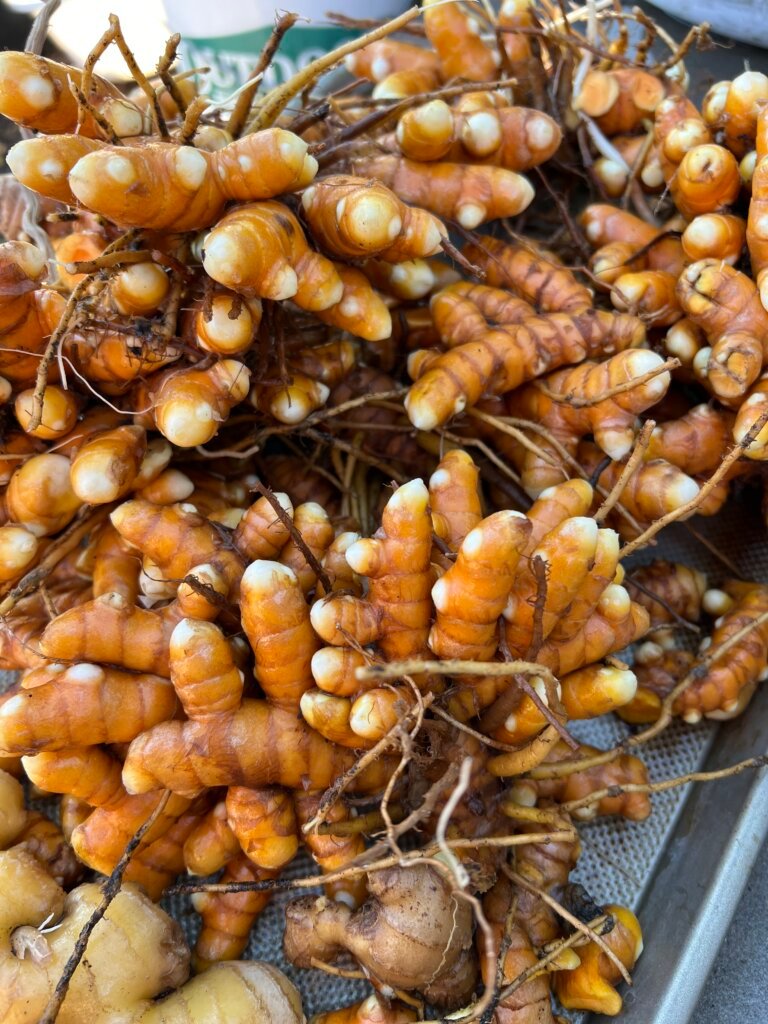
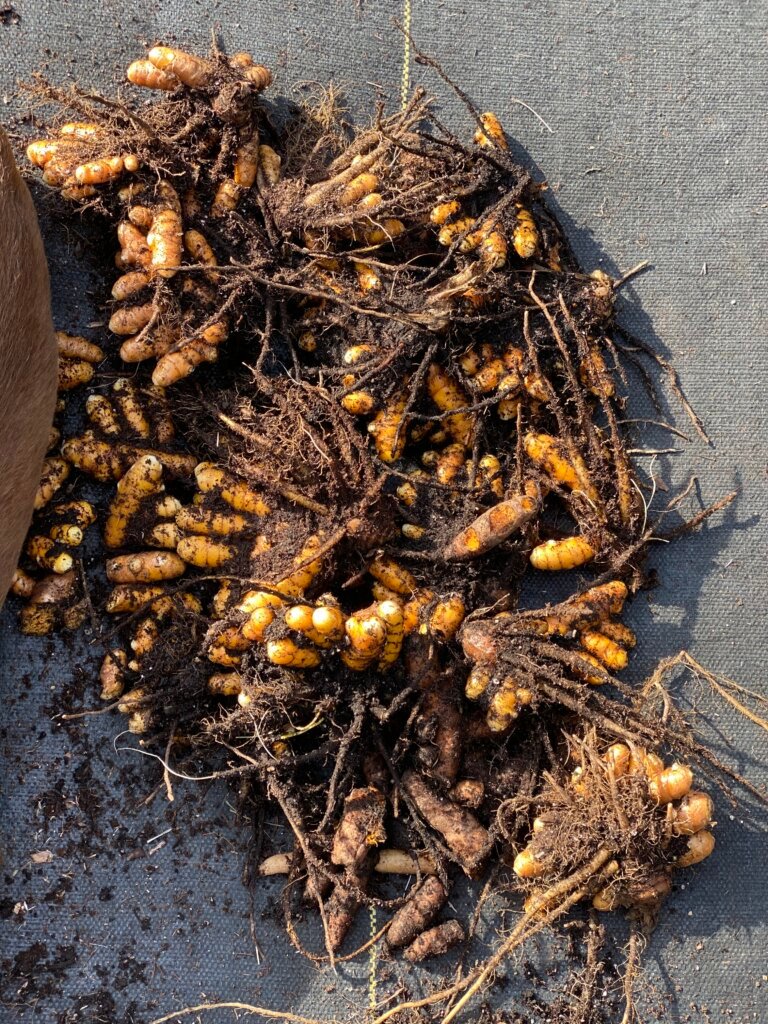
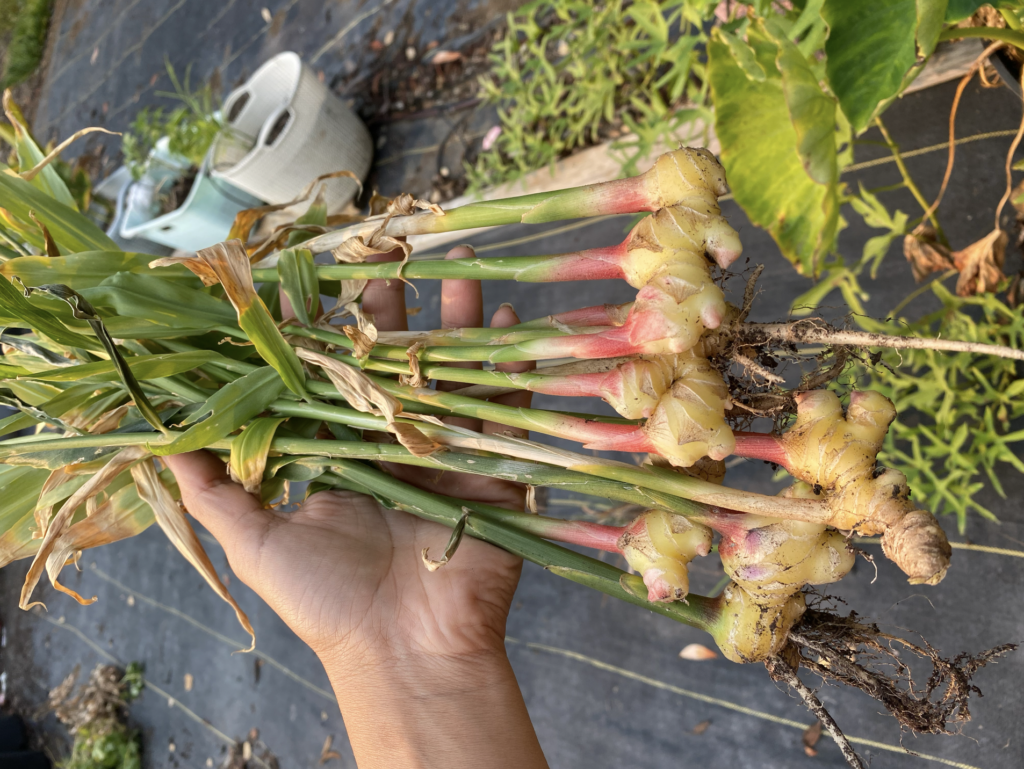
It takes 10–12 months for turmeric to fully grow, and now, after 10 months, I’m harvesting about 4–5 pounds of turmeric and a few ginger rhizomes. I grow turmeric and ginger in my garden every year here in Zone 9b, California. From March 2024 to now (January 2025), I’ve harvested my turmeric crop, continuing a cycle I’ve followed for years. The first time I grew them, I started with organic, store-bought rhizomes, but now I propagate them from my own harvest.
I chose to write this blog post for both turmeric and ginger because they belong to the same family (Zingiberaceae) and grow under the same conditions, so whatever I say for turmeric applies to ginger too.
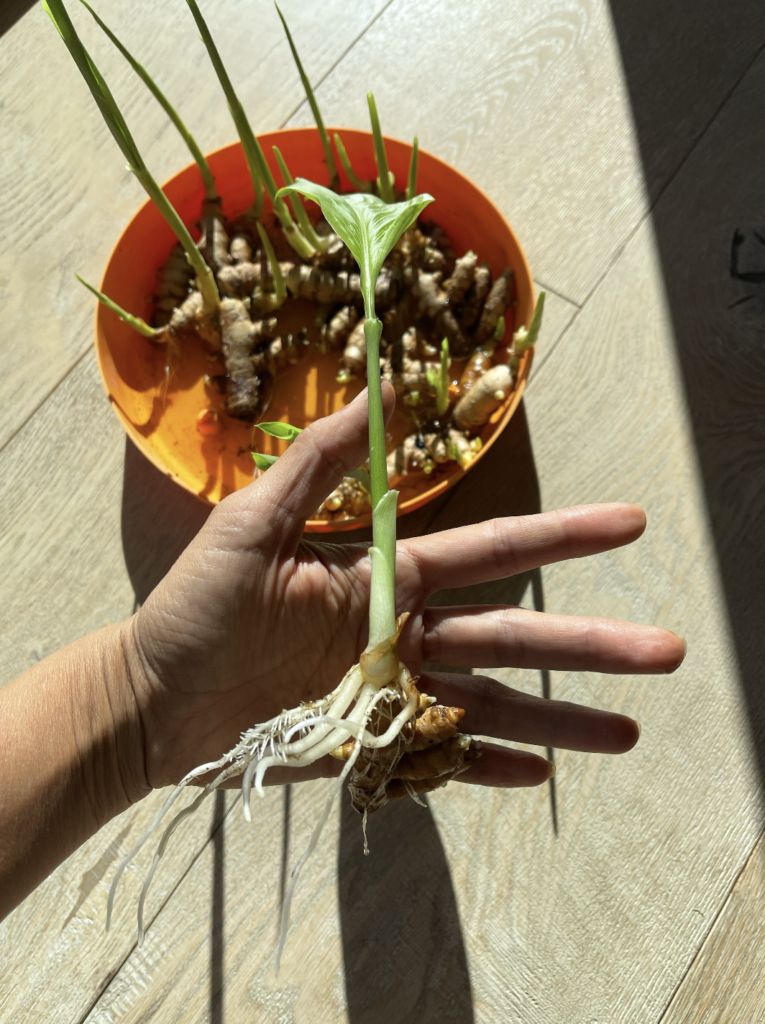
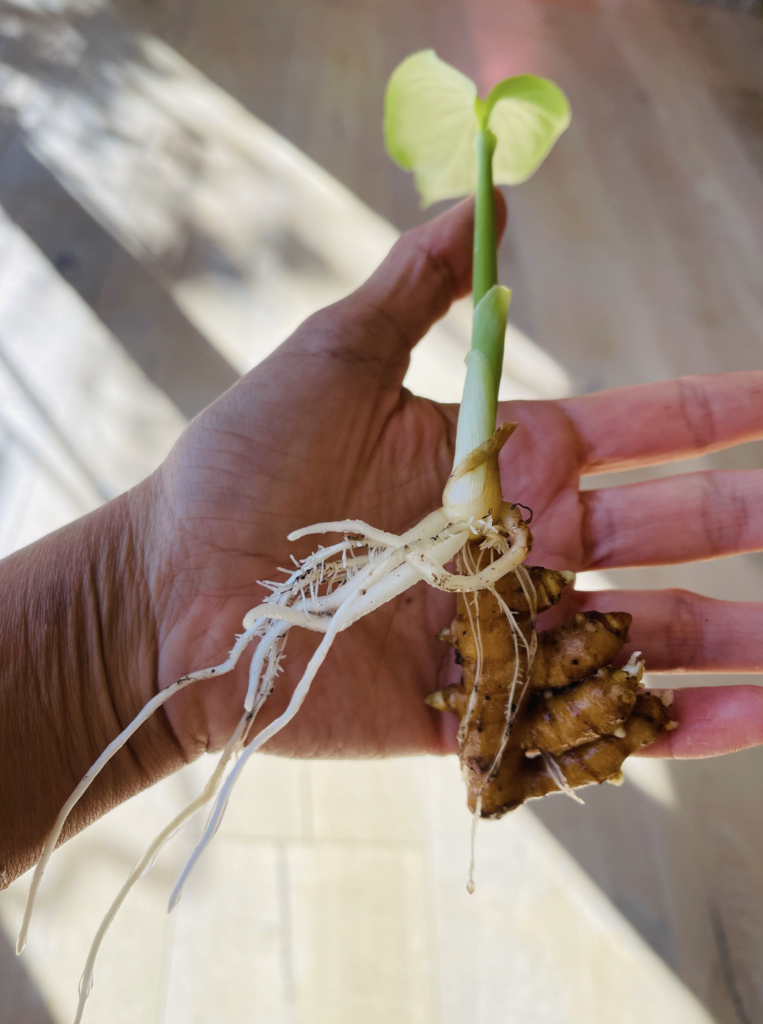
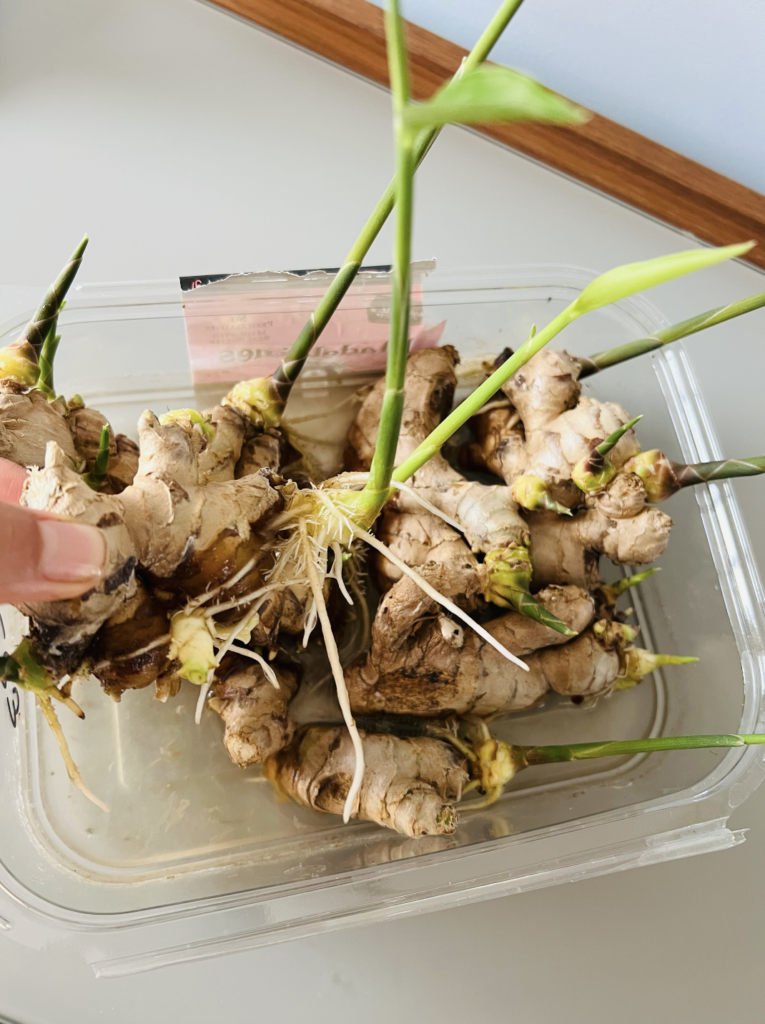
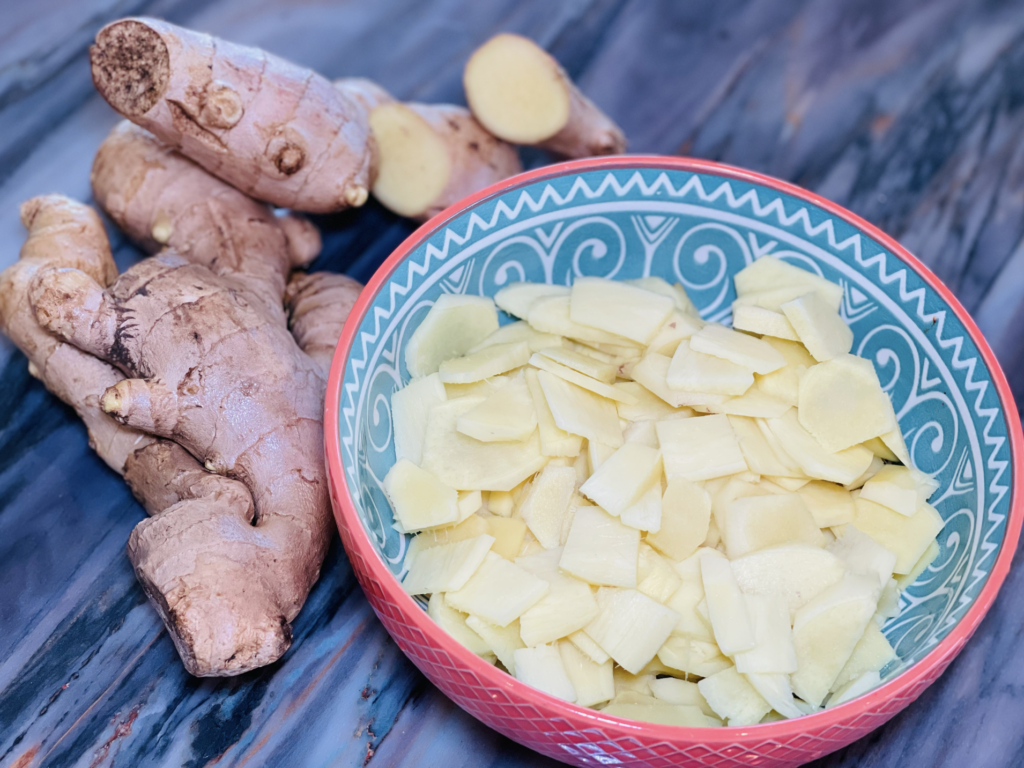
Unlike most gardeners who follow the traditional method, I take a different approach to starting my turmeric and ginger. Instead of planting them directly in soil, I place the rhizomes in a container with 2–3 inches of water (see the pictures below). After 2–3 weeks—sometimes longer—roots begin to emerge. If left in water for a longer period, small green shoots will also start forming on top. You can choose to plant them in soil as soon as the roots are long enough (about 2-3 inches) or wait until the green shoots appear before transplanting.
I typically plant mine in February or March, depending on when my garden beds are ready. While I have successfully planted them in early March when the soil is still cold, it’s generally better to wait until the risk of frost has passed for optimal growth. However, in my experience, both methods work, and turmeric and ginger can adapt well to either approach. To ensure healthy growth, I always enrich my soil with plenty of homemade compost before transplanting.

Quick Guide: How to Directly Sow Turmeric and Ginger
Growing Turmeric & Ginger (Curcuma longa & Zingiber officinale)
These tropical perennials thrive in USDA Zones 8-11, with warm summers and high humidity, making them ideal for California Zones 9a-10b.
Planting Steps
✔ Rhizome Selection – Use fresh, plump rhizomes from a garden store or grocery store.
✔ Preparation – Cut into 1–3″ pieces with multiple healthy buds. Let dry for 1-2 days to prevent rot.
✔ Planting – Place bud-side up, 2–4 inches deep in well-draining soil.
Growing Conditions
✔ Type – Perennial, goes dormant in winter.
✔ Light – Full sun to partial shade.
✔ Soil – Rich, loose, and well-draining.
✔ Watering – Keep soil moist but not soggy. Avoid overwatering before shoots appear.
✔ Size – Reaches 3–4 feet tall and wide.
Planting & Harvesting
✔ Best Time to Plant – Early spring, once soil warms up.
✔ Propagation – By dividing rhizomes.
✔ When to Harvest – 10–12 months after planting, in late fall to early winter.
✔ How to Harvest – Gently dig up without damaging rhizomes; leave some for regrowth.
✔ Storage – Refrigerate fresh, or freeze/dry for long-term use.
Growing Indoors
✔ Can be grown indoors, but may go dormant in winter due to cooler temperatures and lower light. Reduce watering and wait for new growth in spring.
By growing turmeric and ginger at home, you’ll enjoy fresh, homegrown rhizomes while adding a tropical touch to your garden! 🌱✨

Why I grow Turmeric and Ginger?
Turmeric (Curcuma longa) and Ginger (Zingiber officinale) are not just flavorful additions to the kitchen—they are powerhouse plants packed with health benefits.
As someone who cooks daily, I’ve found turmeric to be an indispensable ingredient in Persian cuisine, especially in stews that pair beautifully with rice. Turmeric powder is our #1 spice, bringing warmth, depth, and that signature golden hue to dishes.
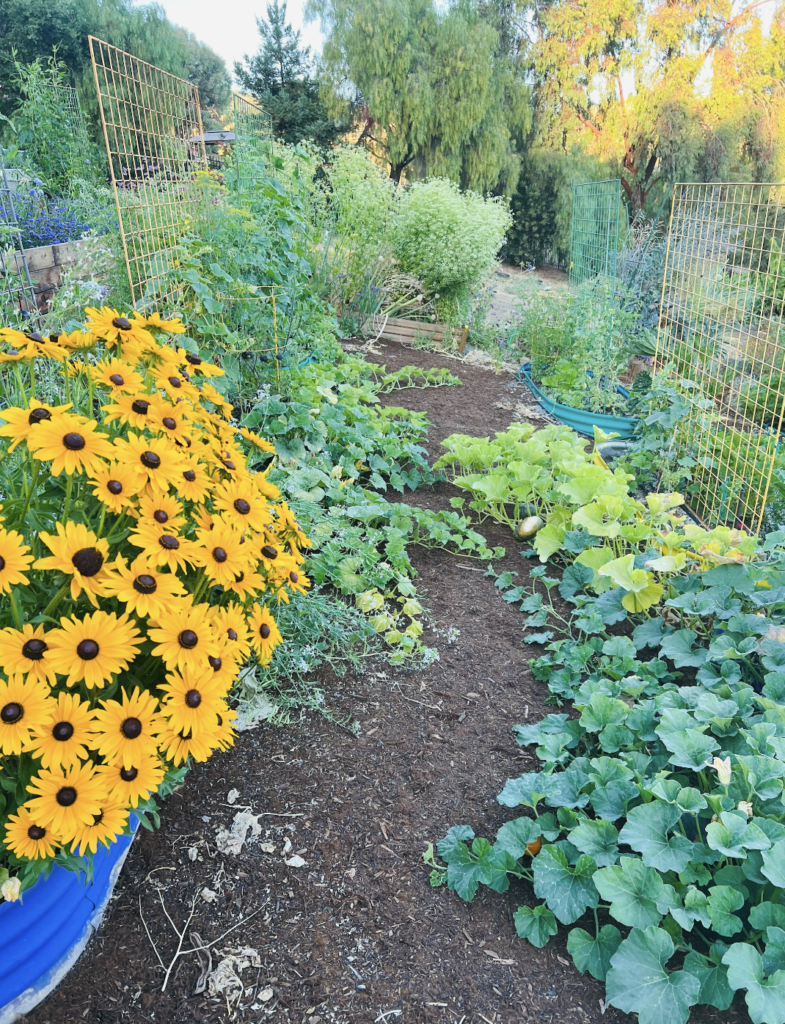
Inspired by my love for this spice, I started growing turmeric (and ginger!) at home, both in pots and raised beds, here in Northern California.
Let me walk you through everything I’ve learned, from planting to harvesting and even storing these golden rhizomes.
Caring for and Feeding Ginger & Turmeric
Although tropical in nature, both ginger and turmeric follow a seasonal growth cycle, with an active growing phase in warmer months and a dormant period in cooler temperatures. In spring, as temperatures rise, shoots begin emerging from the soil. Ginger tends to sprout faster, while turmeric takes its time—often a month longer before growing vigorously in the summer heat.
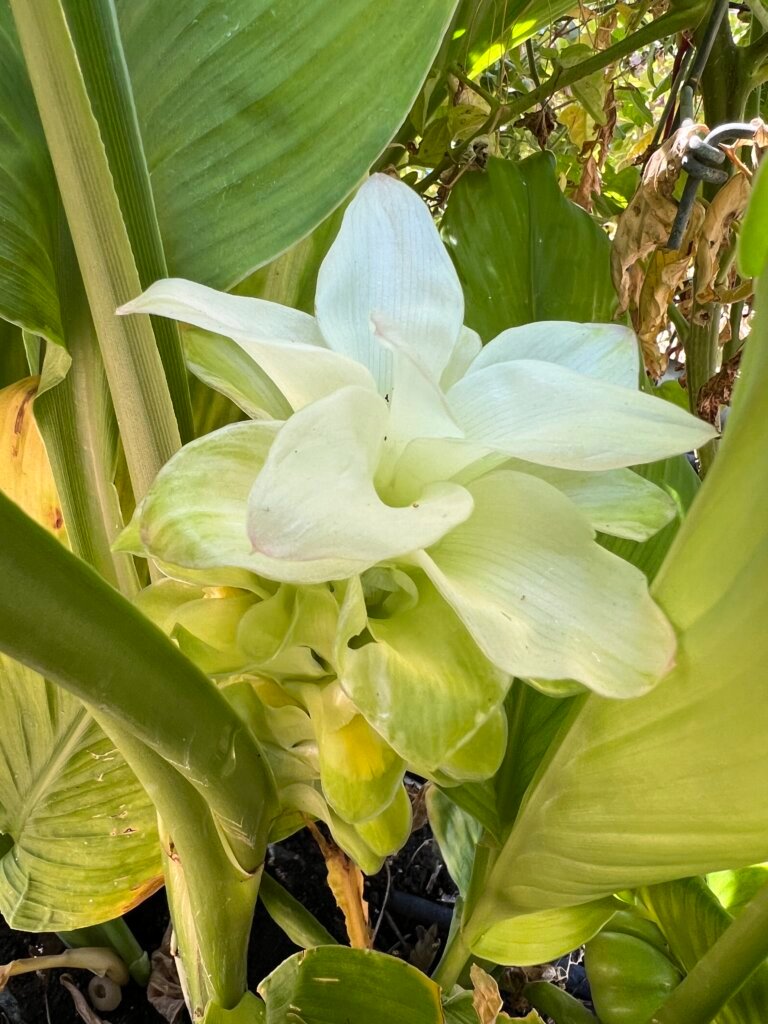
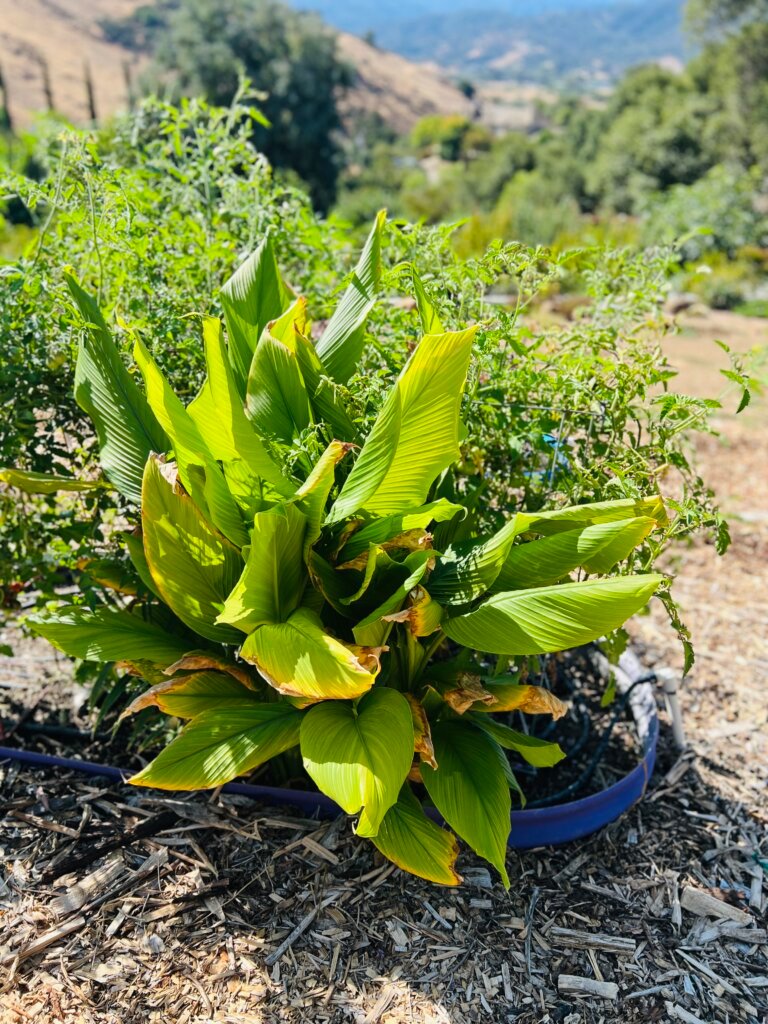
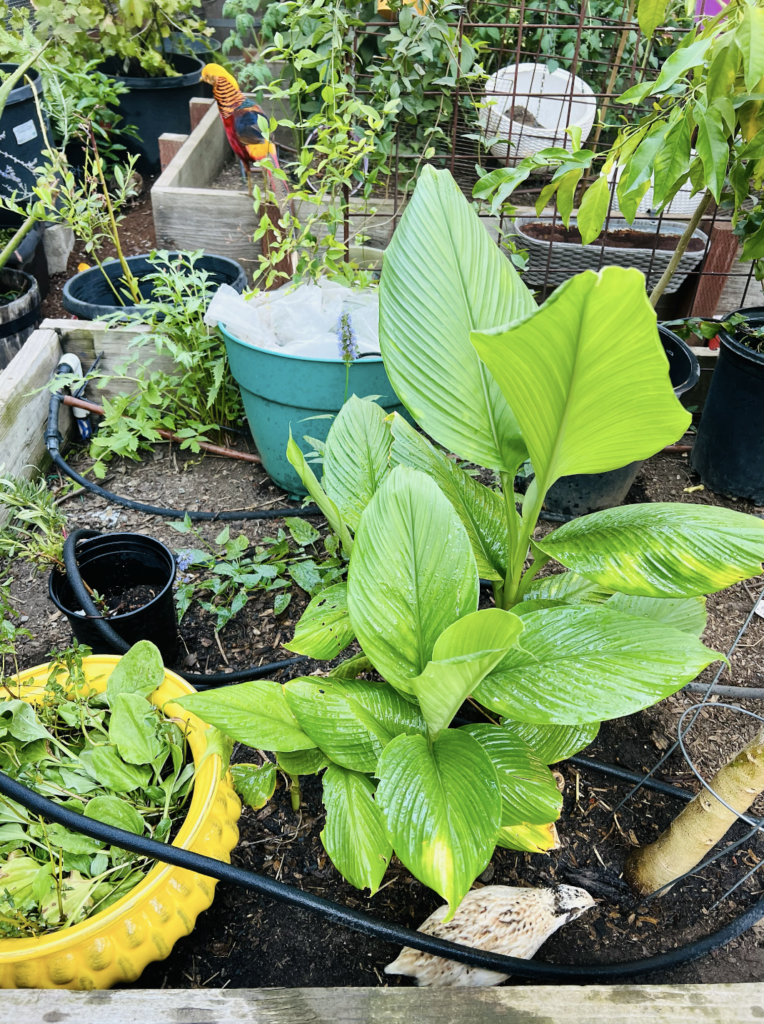
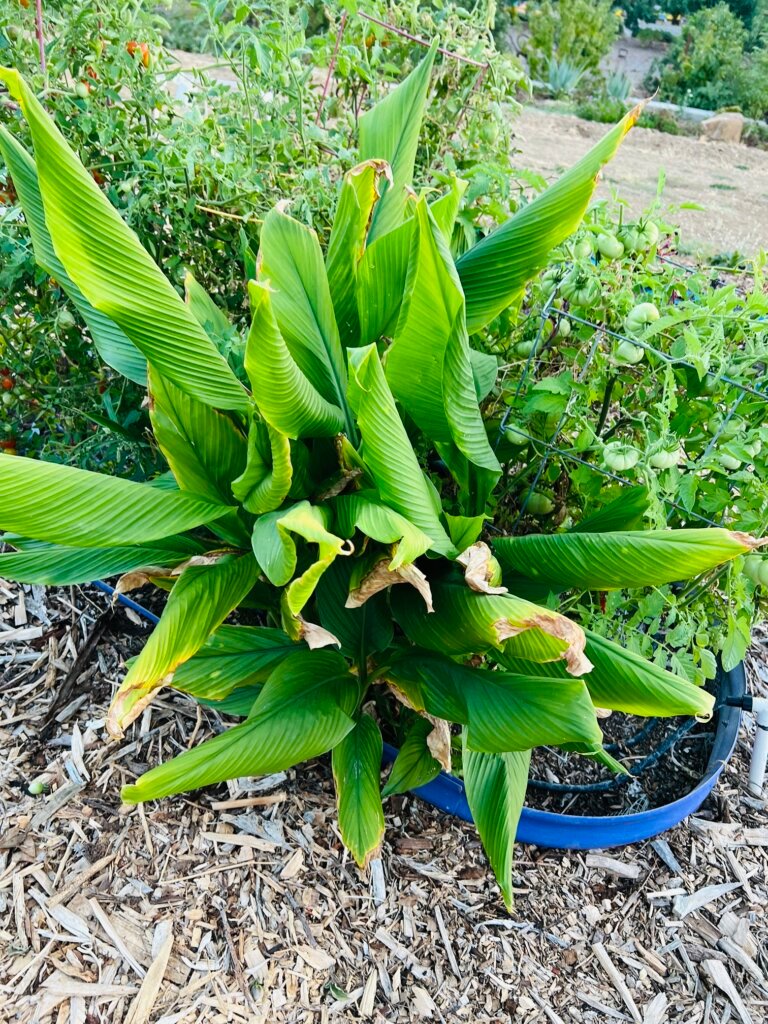
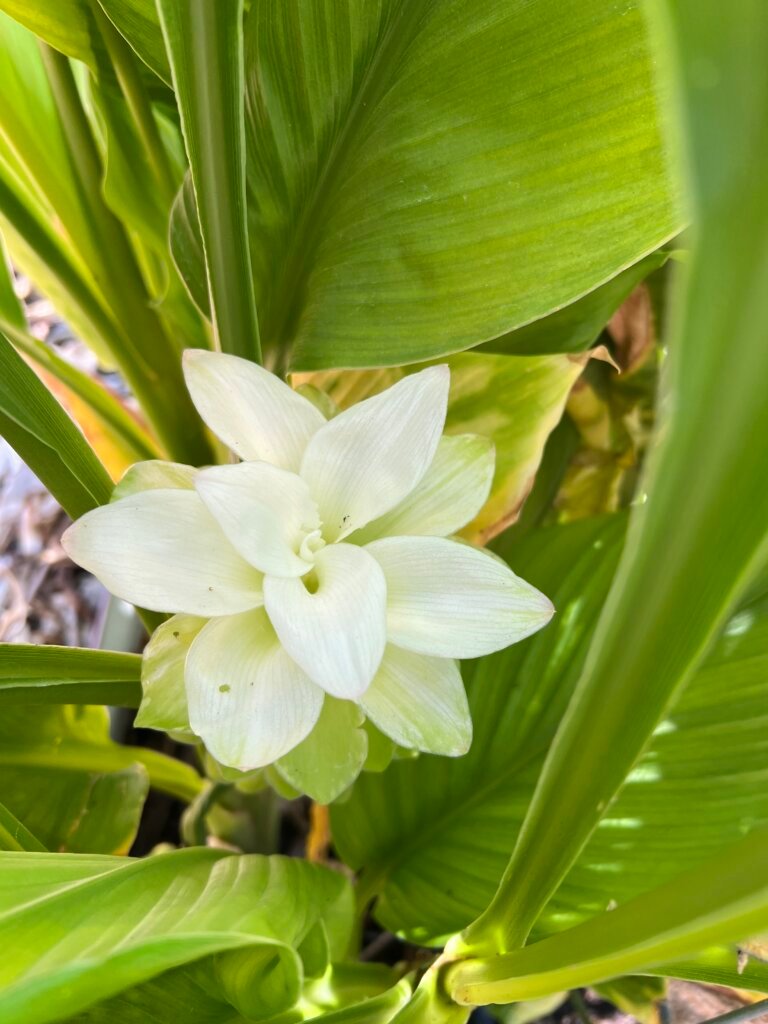
Turmeric and ginger thrive in tropical and subtropical climates, but with the right care, they can flourish in Northern California and other warm regions. These plants grow from rhizomes—underground stems that spread horizontally and store nutrients. Their lush green foliage adds a beautiful, tropical feel to any garden, and occasionally, they surprise growers with delicate flowers. I was thrilled when I saw my first turmeric flower appear after months of patient care—it was an unexpected and rewarding moment.
By providing warmth, moisture, and nutrient-rich soil, turmeric and ginger will thrive in a variety of garden settings, whether in raised beds, containers, or shaded areas with companion plants. With proper care, these resilient rhizomes will continue growing and returning each year, bringing beauty and functionality to your garden.
Temperature and Light Requirements
Ginger and turmeric thrive in warm, humid conditions but can be sensitive to extreme heat and direct sunlight. In regions with intense summers, prolonged exposure to strong sunlight can cause sunburn on the leaves, which can slow down growth. To prevent this, consider planting them in an area that receives filtered sunlight, such as under the shade of fruit trees or near taller plants that can provide natural protection.
In my garden, I first planted my turmeric, then added two tomato plants in front of them to take advantage of full sun. As the tomato plants grew, they created a natural canopy, providing much-needed shade for my turmeric and ginger. I believe this shading helped my turmeric thrive, and for the first time, I saw a turmeric flower form—a rare and exciting moment!
If you’re looking for alternative companion plants, fava beans or other tall-growing beans work well as natural shade providers. These plants not only offer protection from excessive heat but also improve soil health by fixing nitrogen, which benefits turmeric and ginger. Strategic companion planting like this can make a big difference in your harvest and overall plant health.
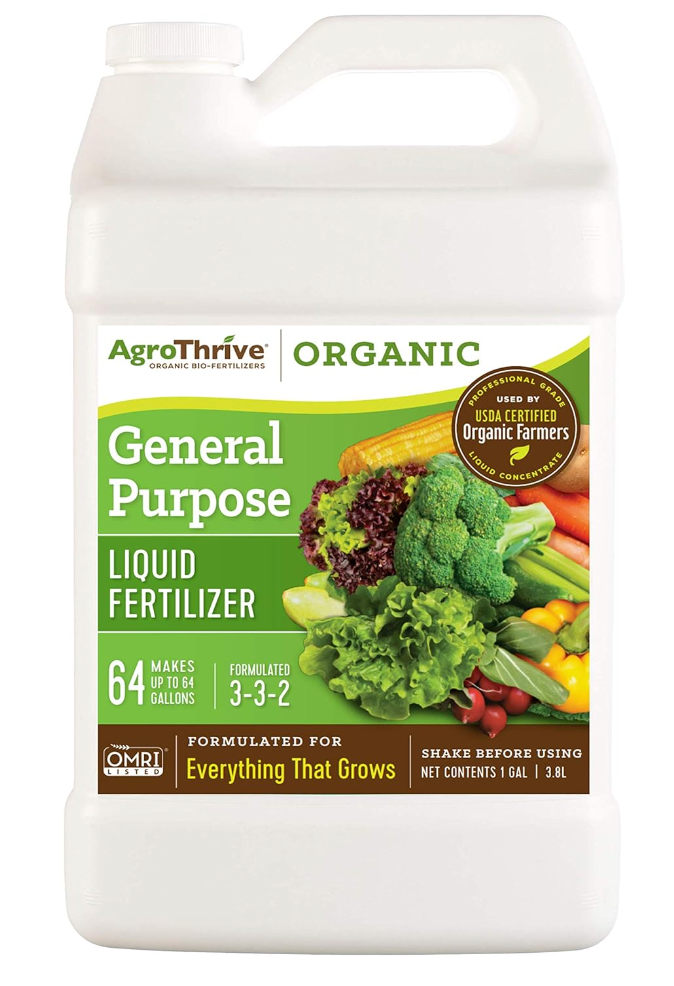
Soil and Fertilization
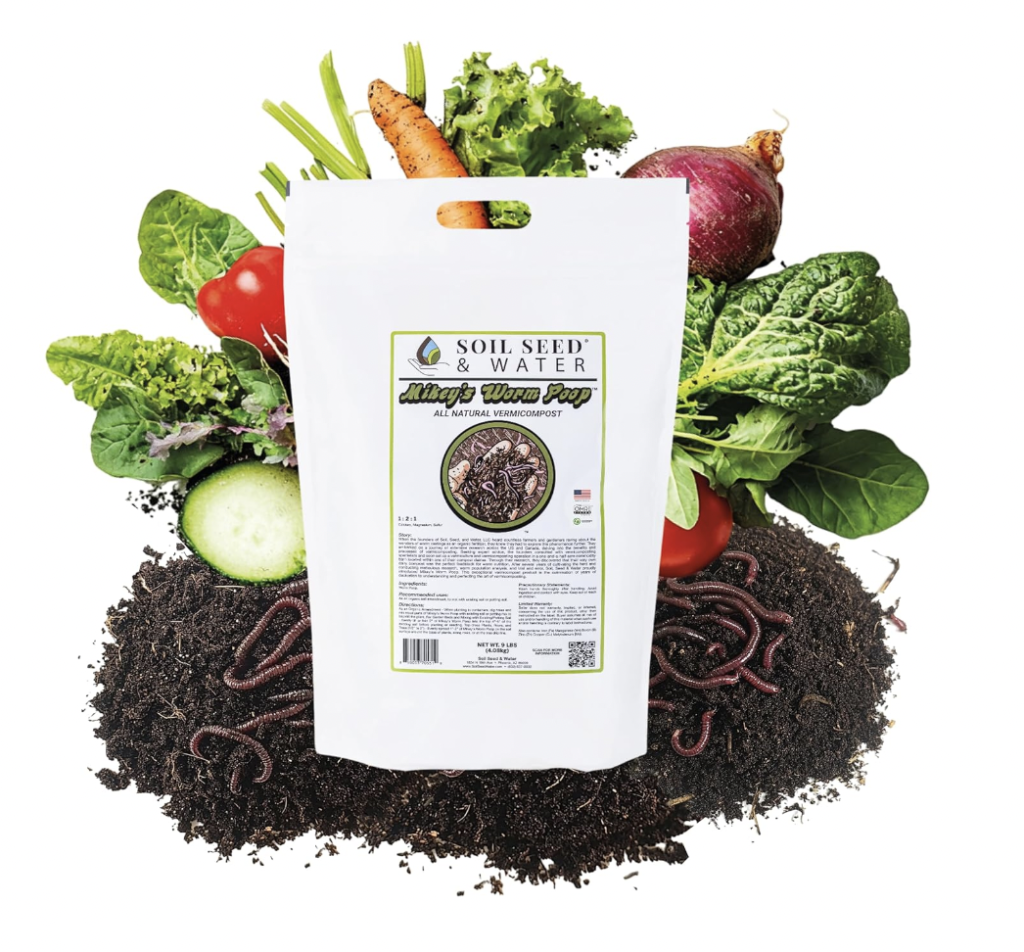
For optimal growth, turmeric and ginger should be planted in nutrient-rich, well-draining soil. Adding compost is one of the best ways to improve soil fertility while enhancing its structure. However, it’s important to use fertilizers wisely—too much nitrogen can result in excessive leaf growth while limiting rhizome development.
Luckily, I make my own compost, ensuring nothing in my kitchen goes to waste. I maintain several compost bins, and every time I add fresh fruit peels and kitchen scraps, I scatter a layer of topsoil over them. This layering method helps deter fruit flies, reduces odors, and speeds up decomposition. Keeping my compost moist is crucial for efficient breakdown, so if I notice it drying out, I lightly hose it down for a minute and let the process continue undisturbed.
Once my compost is fully decomposed, I top-dress my garden beds before spring, enriching the soil with valuable worm castings and beneficial microorganisms. This natural feeding method sustains my soil for months before I need to apply any additional fertilizers.
In addition to composting, mulching is an essential practice for growing turmeric and ginger. A thick layer of mulch helps retain moisture, suppress weeds, and regulate soil temperature, creating an ideal environment for rhizome development. Some commercial growers hill up soil around ginger plants, similar to how potatoes are cultivated, to encourage larger rhizome growth. While this practice isn’t strictly necessary for home gardens, building healthy, compost-rich soil will naturally promote a bountiful harvest of turmeric and ginger.
Watering Needs: Keeping Turmeric and Ginger Hydrated
Regular watering is essential for turmeric and ginger, but they do not tolerate waterlogged soil. Overwatering, especially before the plants are fully established, can lead to root rot. Once shoots emerge, it’s important to keep the soil consistently moist, but also allow the top layer to dry slightly between waterings to prevent fungal issues. These plants tend to slow their growth when temperatures drop below 70°F and during extreme heat above 90°F.
Luckily, all my garden beds are on a scheduled irrigation system, so I rarely have to worry about manually checking for water. However, I’ve learned that even with an irrigation setup, unexpected issues can arise. There have been times when I noticed yellowing or wilting leaves, and my first instinct was that something was off. Sure enough, after investigating, I found that a squirrel or a mouse had chewed through my irrigation pipes, disrupting the water supply. If this happens unnoticed, especially during the peak of summer, it can be devastating for a vegetable garden.
For this reason, I regularly inspect my irrigation lines, especially when I see signs of stress in my plants. When temperatures soar, turmeric and ginger benefit from deep watering in the morning or late afternoon to help them withstand the heat. A thick layer of mulch around the plants also helps retain moisture and regulate soil temperature, reducing the risk of water stress.
While turmeric and ginger don’t require excessive water, a stable and efficient watering system is key to keeping them happy—and staying ahead of unexpected disruptions is just as important as watering itself!


Growing Season and Climate Adaptability
In ideal conditions with at least 10 frost-free months, turmeric and ginger thrive and produce well, developing large, healthy rhizomes. However, even in regions with a shorter growing season (7–8 frost-free months), they can still grow successfully, though their rhizome size may be slightly smaller. If you live in a cooler climate, growing them in containers is a great option, as you can move them indoors when temperatures drop, extending their growing period.
In my Zone 9b garden, I start my turmeric and ginger indoors in water, then transplant them into raised beds as soon as the weather warms up. I’ve also experimented with early planting in March when the soil is still slightly cold, and while they survived, they took longer to sprout. Ideally, waiting until the last frost has passed leads to stronger, faster-growing plants.
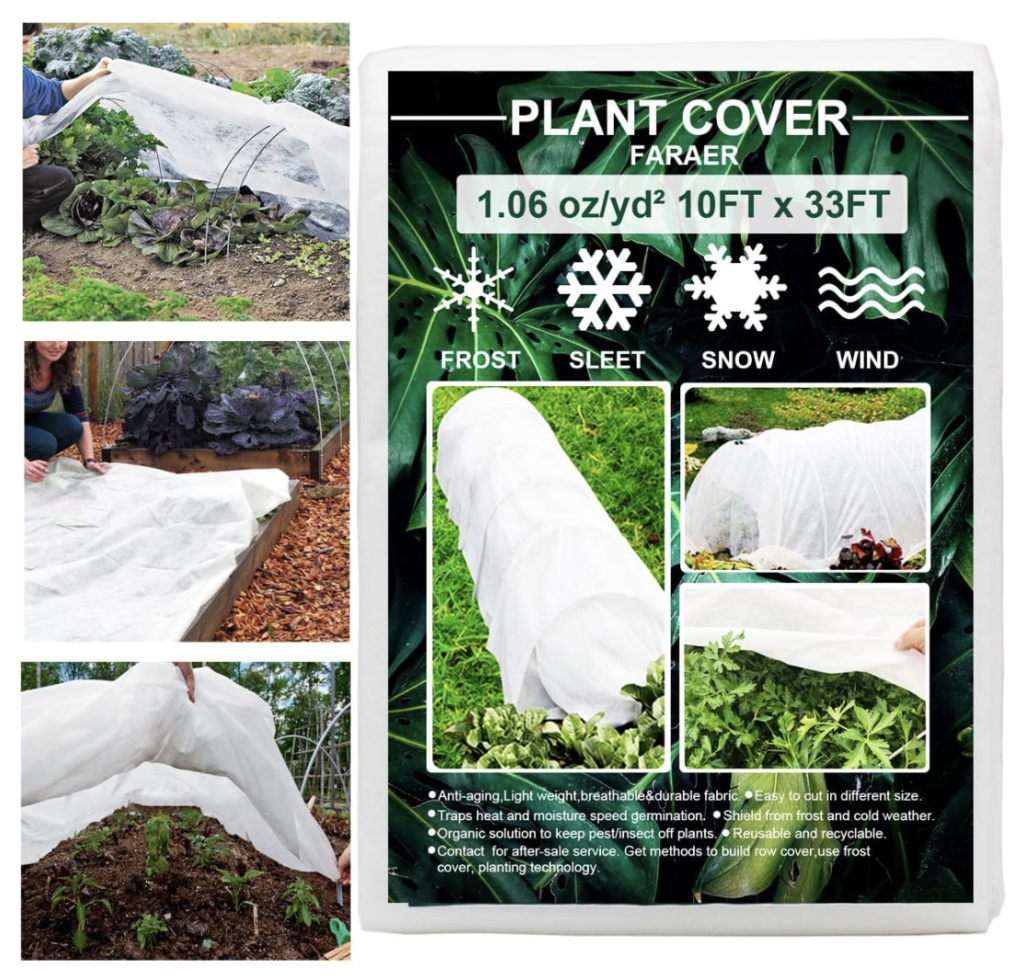
One challenge I’ve faced is unexpected cold snaps in late spring. Since turmeric and ginger are sensitive to low temperatures, I’ve found that covering them with row covers or fabric on chilly nights helps prevent stress. Mulching around the base of the plants also insulates the soil, keeping the rhizomes warm as they establish.
In particularly hot climates, like the peak of summer in California, they can experience heat stress. I’ve noticed that while my ginger tolerates full sun well, turmeric benefits from partial shade, especially during the hottest parts of the day. Companion planting with taller crops like tomatoes, beans, or even sunflowers has helped provide natural shade, preventing leaf burn and improving overall growth.
By adjusting planting times, using protective measures, and experimenting with different placements in the garden, turmeric and ginger can adapt well to a variety of climates, even outside their traditional tropical habitat!

Pests and Disease Resistance: Protecting Your Turmeric and Ginger Organically
One of the benefits of growing ginger and turmeric is their natural resistance to pests and diseases. Unlike other crops that require constant attention, these rhizomes are relatively low-maintenance and resilient. Unless grown on a commercial scale, they rarely suffer from major pest problems. Occasionally, you may notice a few nibbled leaves, but for the most part, they remain healthy throughout the growing season.
Using Sacrifice Plants for Pest Control
To further protect my turmeric and ginger, I always plant a variety of herbs and leafy greens around them as sacrifice plants—plants that attract pests away from my main crops. The most common pests in my garden are earwigs and pill bugs, which likely exist in most gardens in this area. Additionally, grubs can be highly destructive to all plants, feeding on roots and weakening growth.
To manage soil-dwelling pests like grubs, I have tried beneficial nematodes, which I spray into the soil as a natural control method. This can be effective against many common garden pests, but since this topic involves more details, I’ll cover it another time.
One advantage of growing turmeric and ginger is that their leaves don’t seem to attract many pests—at least, I haven’t had any pest problems with them over the past few years. However, I still use sacrifice plants around them to keep pests from damaging other crops.
I’ve found that Chinese cabbage, kale, and Swiss chard work well as sacrifice plants because pill bugs and earwigs prefer their tender young leaves. Swiss chard grows fast, making it a great trap crop since its soft, young leaves attract pests quickly. By providing these alternative food sources, pests are naturally drawn away from my turmeric and ginger, reducing damage to my main crop.
In addition to using sacrifice plants, maintaining diversity in the garden bed helps create a balanced ecosystem. Companion planting with flowers, herbs, and nitrogen-fixing plants not only deters pests but also improves soil health and enhances the overall resilience of the garden.
✅ Tip: Grow other herbs close to turmeric and ginger roots if possible. For example, I always plant green onions near my herbs and vegetables. I’ve learned that green onions help repel pests—not 100%, but they are still effective in keeping unwanted bugs away from delicate plants.
Organic Methods for Controlling Earwigs and Pill Bugs
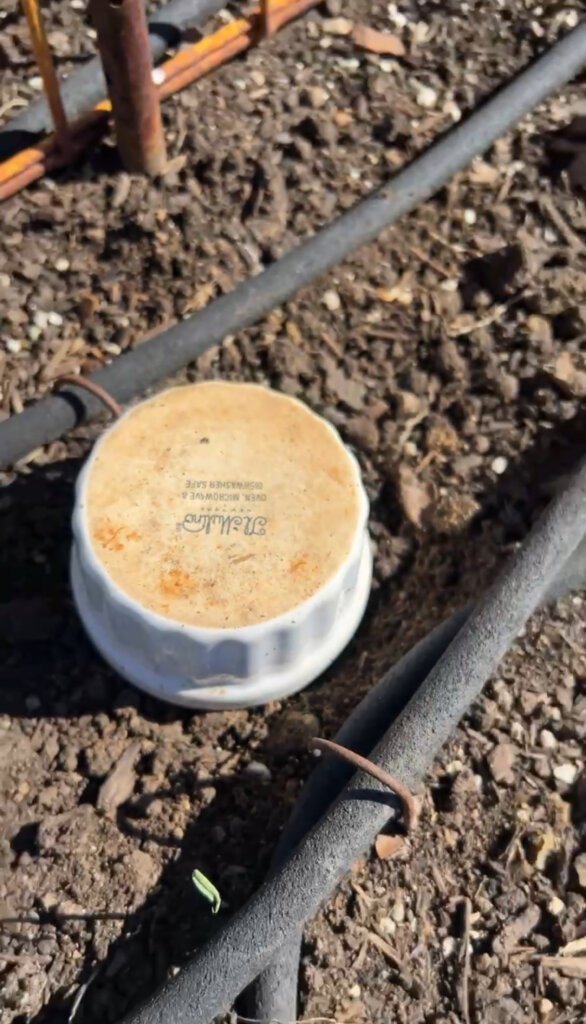
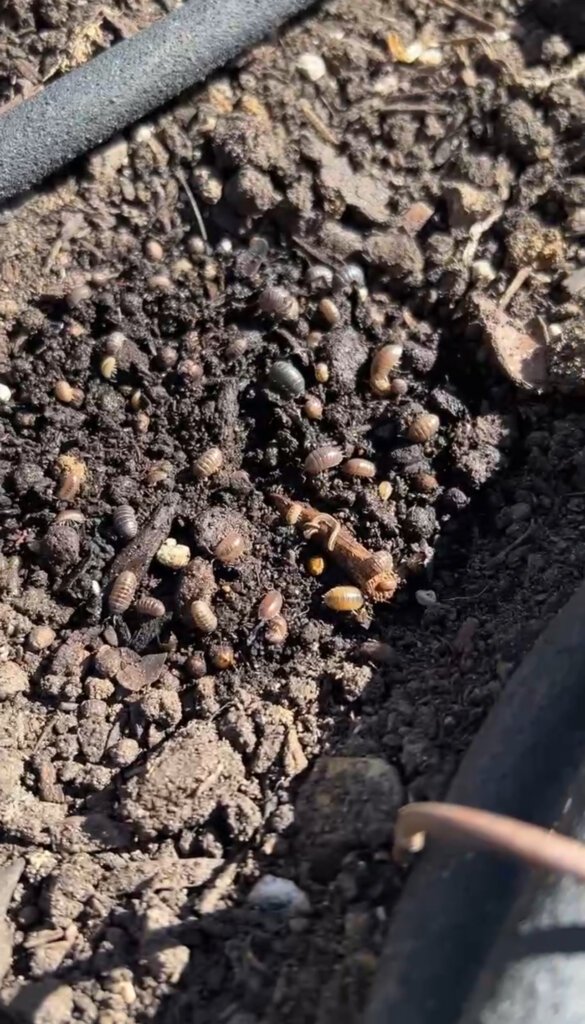
While sacrifice plants help minimize pest pressure, I also take organic, hands-on steps to keep earwigs , pill bugs and slugs under control. One of my most effective methods is using unwanted ceramic or china bowls as traps. I place them upside down in shaded, moist areas of the garden beds, creating the perfect hiding spots for these pests.
Each morning or evening, I lift the bowls and collect the earwigs and pill bugs that have taken shelter underneath. Instead of discarding them, I offer them to my beloved quails and chickens, who happily feast on these garden invaders. This method not only keeps my turmeric and ginger safe but also provides a natural protein source for my birds.
By combining sacrifice plants, strategic companion planting, and organic pest control techniques, I’ve been able to successfully grow strong, healthy turmeric and ginger without the need for chemicals. With the right balance of warmth, moisture, and nutrients, you can also enjoy a thriving harvest of these golden rhizomes in your own garden!

Q & A
Can You Grow Ginger or Turmeric from Seeds?
No, you cannot grow ginger or turmeric from seeds because they do not produce viable seeds for propagation. Both turmeric (Curcuma longa) and ginger (Zingiber officinale) are sterile plants, meaning they have been cultivated for so long that they no longer naturally set seeds. Instead, they reproduce through rhizomes, which are underground stems that sprout new shoots and roots. The best way to grow them is by planting fresh, plump rhizomes with visible buds (eyes), which will eventually develop into new plants. This vegetative propagation method ensures that the plants remain true to their variety and allows them to grow much faster than if they were grown from seeds—even if viable seeds existed.
Do Ginger or Turmeric Flowers Ever Produce Seeds?
Turmeric (Curcuma longa) and ginger (Zingiber officinale) rarely produce seeds, and even when they do, the seeds are usually sterile and not viable for propagation. These plants have been cultivated for thousands of years through vegetative propagation (rhizomes), which has led to the loss of their natural ability to reproduce by seed.
Turmeric Flowers and Seed Production:
Turmeric plants can occasionally produce small, capsule-like seed pods after flowering, but they rarely contain fertile seeds. This is because turmeric is a highly hybridized, sterile species, meaning its flowers do not undergo natural pollination that results in seed formation.
Ginger Flowers and Seed Production:
Similarly, ginger plants do flower, especially in ideal tropical conditions, but they almost never produce viable seeds. The cultivated ginger variety grown for consumption is a sterile hybrid, which means its flowers do not develop functional seeds that can be used for planting.
How Ginger and Turmeric Reproduce:
Since natural seed production is unreliable, the best and only effective way to grow ginger and turmeric is through rhizome division. When planted, rhizomes sprout new shoots and roots, creating genetically identical plants to the parent. This method ensures that the plants retain their desirable traits and grow successfully season after season.
If you ever find a flower on your turmeric or ginger plant, consider it a rare and beautiful sight, but don’t expect it to produce usable seeds for growing new plants. Instead, focus on healthy rhizome propagation for a thriving harvest! 🌿✨

Cultivating Turmeric and Ginger in Zone 9b and Cooler U.S. Climates
While turmeric and ginger thrive in warm, humid conditions, they can still be grown successfully in cooler U.S. climates with some extra care. In Zone 9b (California), where I garden, these rhizomes grow well outdoors year-round, but in colder regions (Zones 6–8), additional steps are needed to ensure a good harvest.
Growing Turmeric and Ginger in Cooler Climates
For gardeners in Zones 6–8, where the growing season is shorter, pre-sprouting rhizomes indoors before transplanting them outside after the last frost is key. Since turmeric and ginger require 8–10 months to mature, giving them an early start in a warm indoor space or greenhouse helps ensure a strong yield before fall.
Protecting Turmeric and Ginger from Cold Weather
In colder regions, it’s essential to protect the rhizomes from frost and extend the growing season:
✔ Harvest Before the First Frost – In regions with harsh winters, rhizomes should be harvested before the first hard freeze to prevent damage.
✔ Store for Winter Survival – If harvesting isn’t an option, store rhizomes in slightly damp potting soil in a cool, frost-free place (basement, garage, or insulated shed).
✔ Mulch for Overwintering – If the ground only freezes an inch or less, applying a thick layer of mulch (straw, shredded leaves, or pine needles) can insulate rhizomes and allow them to regrow in spring.
By using these winter protection strategies, you can successfully grow fresh homegrown turmeric and ginger even outside their traditional tropical zones! 🌱✨
Benefits of Growing in Containers:
✔ Mobility – Move pots indoors during winter to prevent frost damage.
✔ Heat Control – Place pots in full sun during summer and partial shade in extreme heat.
✔ Soil Customization – Use light, well-draining soil enriched with compost for optimal growth.
✔ Extends the Growing Season – If grown indoors, plants can continue developing rhizomes longer than in the ground.
Indoor Growing Tips for Turmeric and Ginger
- Choose Large, Deep Pots – A 10-gallon pot or larger gives rhizomes room to spread.
- Provide Warmth & Humidity – Maintain temperatures above 65°F (18°C) and mist occasionally if the air is too dry.
- Use Grow Lights if Needed – In low-light months, supplement with LED grow lights to encourage continued growth.
- Water Sparingly in Dormancy – If plants go dormant indoors, reduce watering significantly to prevent rot.
With the right care, protection, and growing techniques, northern gardeners can successfully cultivate these tropical rhizomes, enjoying fresh turmeric and ginger even in cooler climates! 🌱✨
Planting Turmeric and Ginger in Pots or Beds: A Northern California Advantage
Growing turmeric (Curcuma longa) and Ginger (Zingiber officinale) in Northern California (Zones 9a-10b) is a rewarding experience, thanks to the region’s long growing season, mild winters, and warm summers. While these tropical plants thrive in humid conditions, they adapt well to raised beds and container gardening, making them a versatile addition to any home garden. Whether you choose to grow them in pots for flexibility or in raised beds for maximum yield, both methods offer unique benefits for Northern California gardeners.

Growing Turmeric and Ginger in Pots
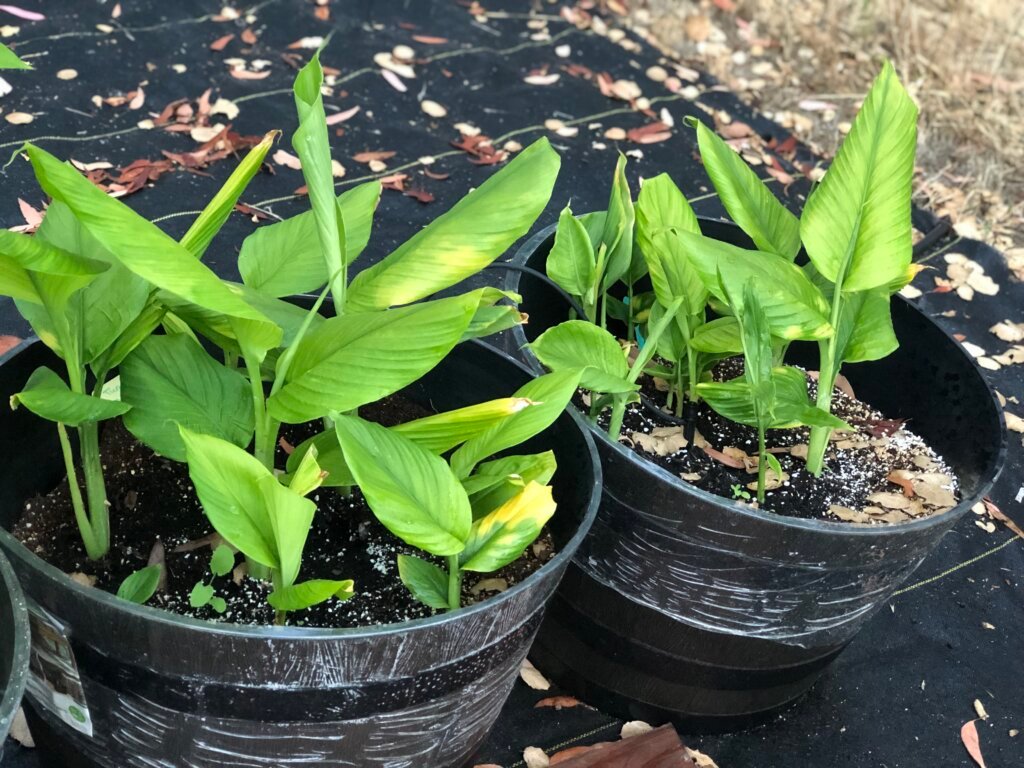
Growing turmeric and ginger in pots is an excellent option for gardeners in Northern California, especially for those who want greater control over microclimate conditions. Container gardening allows for easy mobility, making it possible to adjust sun exposure, protect plants from extreme heat, and even extend the growing season by bringing pots indoors when temperatures drop. Here’s how I successfully grow turmeric and ginger in pots:
1. Choosing the Right Pot
A 10-gallon pot is ideal, as it provides enough room for rhizomes to spread and grow properly. Using a deep, wide container ensures proper root expansion, leading to larger and healthier rhizomes. Drainage holes are essential to prevent water logging, which can cause rot. If you’re growing multiple plants, consider fabric grow bags, which promote aeration and prevent soil compaction.
2. Preparing the Soil
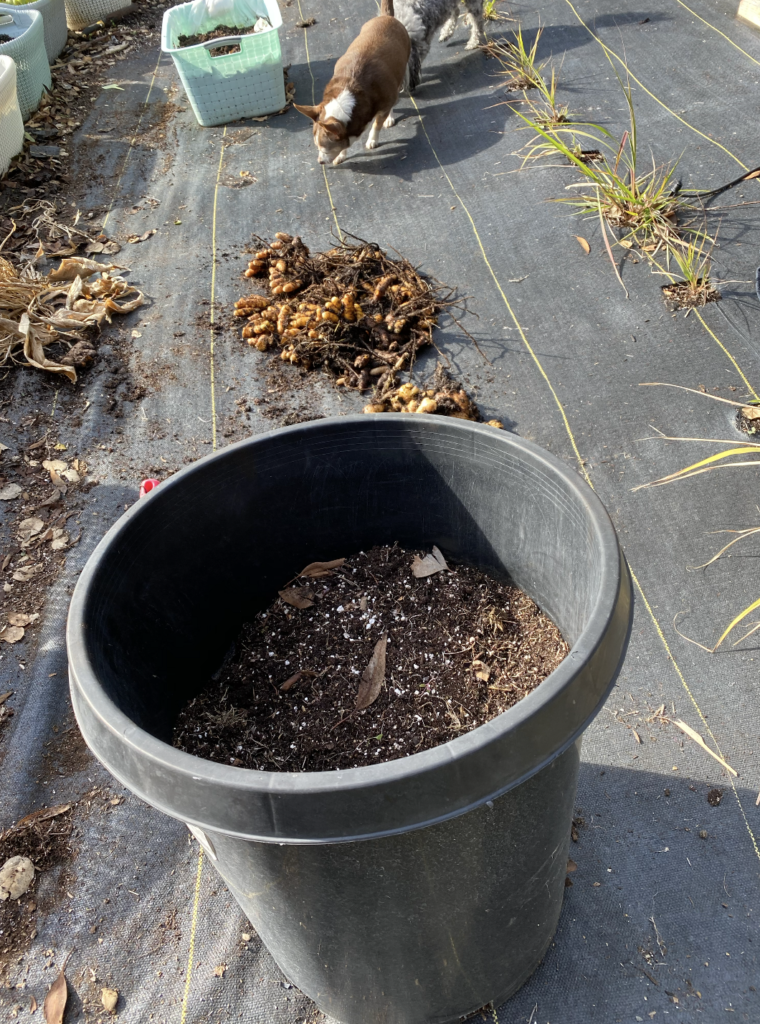
Turmeric and ginger thrive in loose, well-draining soil rich in organic matter. I create a soil blend using:
- Compost for nutrients and beneficial microbes.
- Potting soil for structure and aeration.
- Sand or perlite to improve drainage and prevent compaction.
Adding worm castings and a handful of slow-release organic fertilizer at planting time gives the rhizomes a nutrient boost. I also mulch the top of my pots with straw or shredded leaves to help retain moisture and regulate temperature.
3. Planting Turmeric and Ginger in Pots
- Select healthy rhizomes with visible “eyes” (growth buds).
- Plant them 2 inches deep, with the buds facing up.
- Space them a few inches apart to allow proper growth.
- Avoid overcrowding, as turmeric and ginger spread out as they mature.
If pre-sprouting the rhizomes in water, wait until the roots reach 2-3 inches long, and either plant immediately or wait for green shoots to emerge before transplanting them into the pot.
4. Watering and Light Requirements
- Keep the soil consistently moist but never soggy. Water when the top inch of soil feels dry.
- Humidity is beneficial, so lightly misting the plants can help in drier climates.
- Place the pots in a sunny location with at least 6 hours of indirect or filtered sunlight daily.
- During extreme heat, move pots to partial shade to prevent leaf scorch.
- In colder months, bring pots indoors or protect them with row covers to extend the growing season.
5. Advantages of Growing in Pots
- Protection from extreme weather – Pots can be moved to adjust light and temperature conditions.
- Prevention of soil-borne diseases – Fresh potting soil reduces the risk of infections.
- Easier harvesting – Rhizomes are easier to access and don’t require deep digging.
- Space efficiency – Ideal for small gardens, patios, and balconies.
Growing turmeric and ginger in pots has allowed me to enjoy homegrown rhizomes year-round, even when garden space is limited. With the right care, container-grown plants can be just as productive and healthy as those grown in the ground!
Growing Turmeric and Ginger in Raised Beds
For those with garden space, planting turmeric and ginger in raised beds offers higher yields and better soil moisture retention. Northern California’s mild climate allows them to flourish in well-prepared garden beds, producing strong, healthy rhizomes.
Best Practices for Growing in Beds:
- Prepare the Soil: Use a well-draining mix enriched with compost, aged manure, and organic matter. Loose, nutrient-rich soil encourages larger rhizome development.
- Planting Timing: In Northern California, plant rhizomes in early spring (March-April) after the last frost. If starting earlier, pre-sprout them indoors in water and transplant them once they develop strong roots.
- Spacing: Plant rhizomes 6-12 inches apart, allowing them space to expand.
- Mulching: A layer of straw, leaves, or grass clippings helps retain moisture and regulate soil temperature.
- Watering Needs: Although my garden beds are on a scheduled irrigation system, I always check for yellowing or wilted leaves, which could indicate damaged irrigation lines from squirrels or rodents. Consistent moisture is key, but avoid overwatering to prevent rot.
- Companion Planting for Shade: In my garden, I planted tomatoes in front of turmeric and ginger. As the tomatoes grew taller, they provided natural shade, which helped prevent sun stress. You can also use fava beans, other beans, or sunflowers to create shade.
Why Grow in Raised Beds?
- Better Drainage: Prevents rhizomes from rotting in waterlogged soil.
- Higher Yields: More space allows rhizomes to spread and develop fully.
- Improved Soil Quality: Easier to add compost, mulch, and organic matter to maintain fertility.
Which Method is Best for You?
- Choose POTS if you want control over conditions, have limited space, or need to move plants indoors in colder months.
- Choose RAISED BEDS if you want higher yields, have room to expand, and can provide partial shade during extreme heat.
Both methods work well in Northern California’s climate, and by adapting your setup to your garden space, you can successfully grow fresh, homegrown turmeric and ginger every season!
How to Harvest Turmeric and Ginger
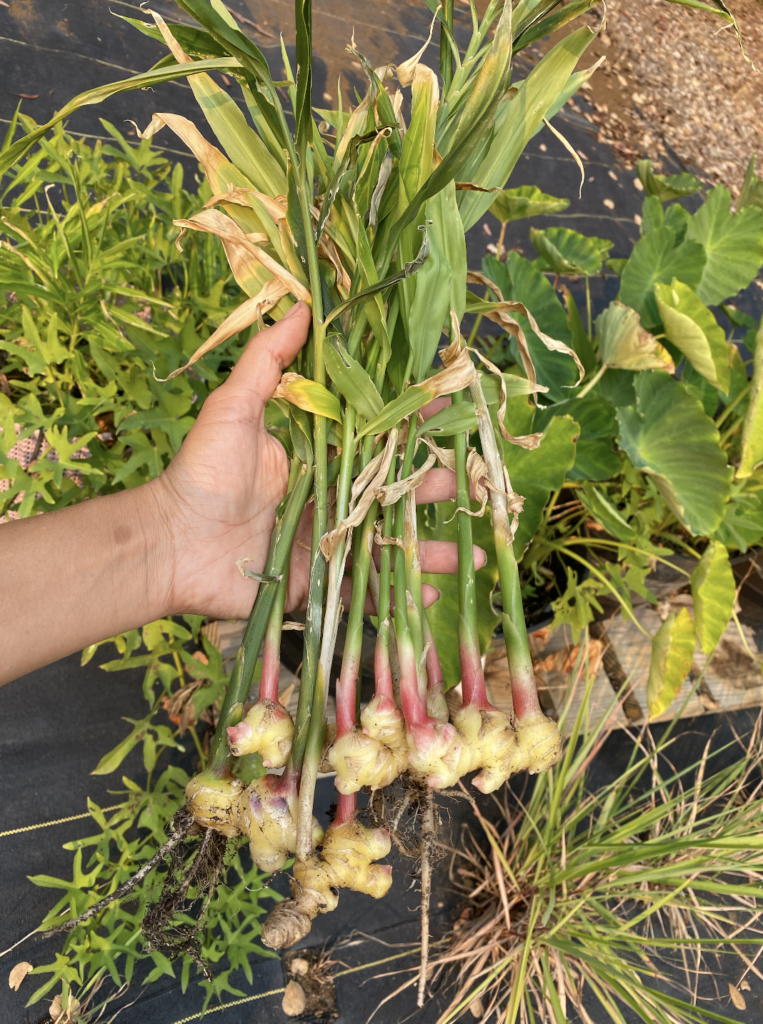
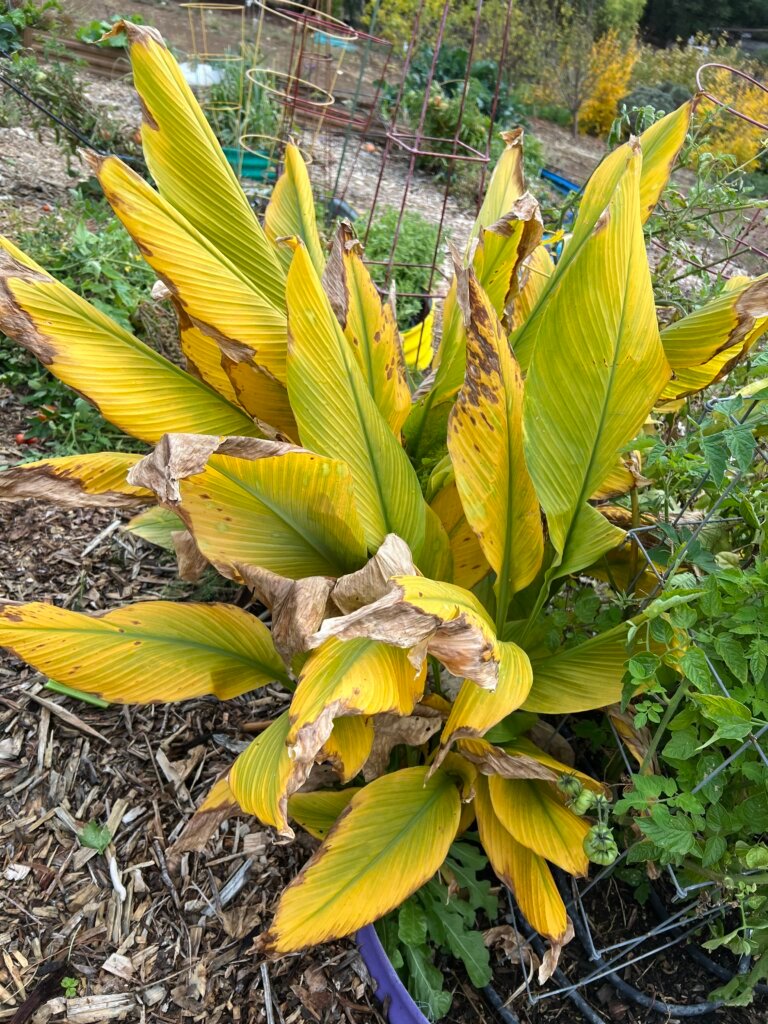
Turmeric and ginger require 8–10 months to fully mature, and knowing when to harvest can impact both the flavor and size of your yield. The best way to determine readiness is by observing the leaves, which will yellow and dry out as the rhizomes reach maturity.
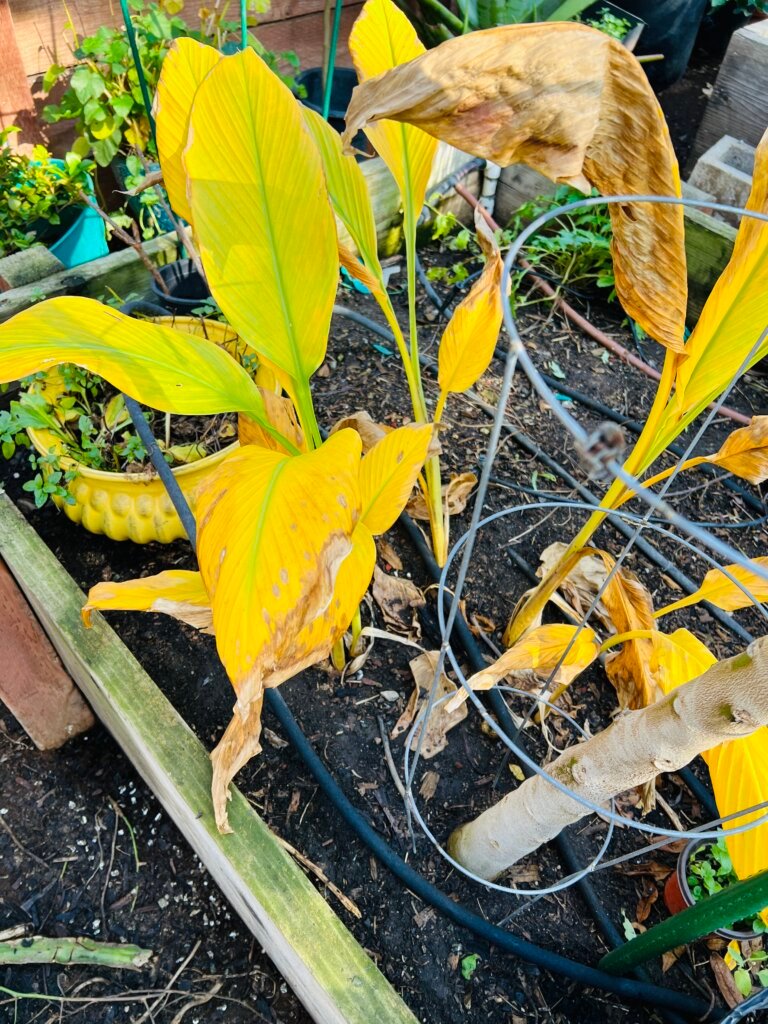
When to Harvest?
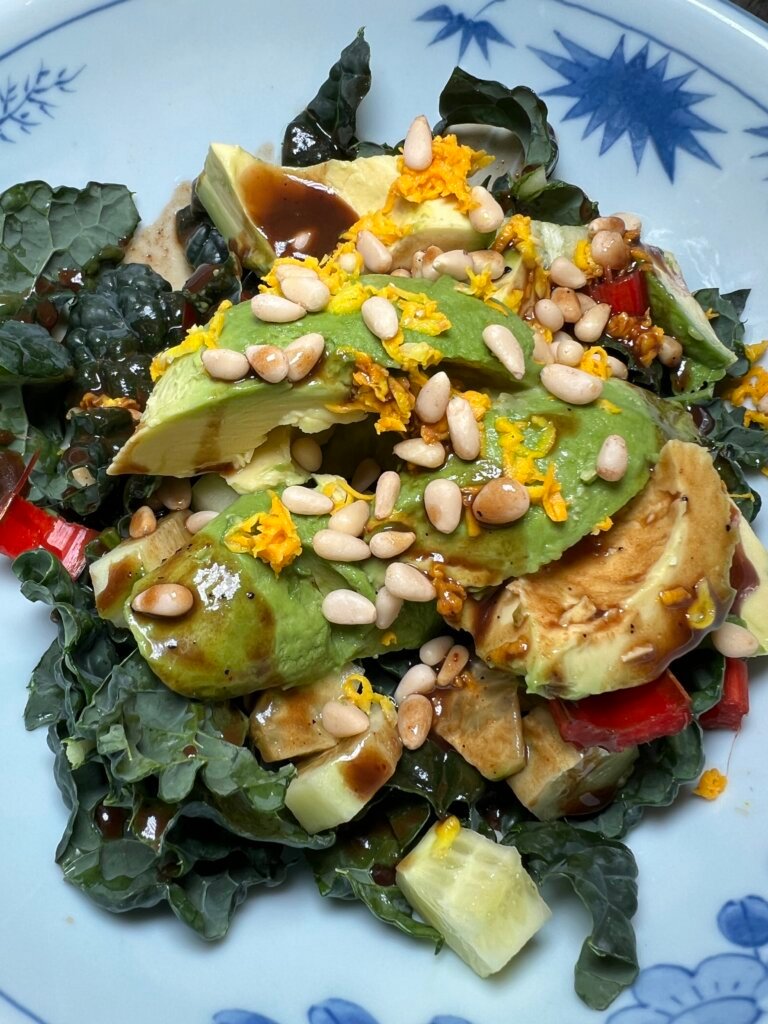
- Early Harvest (7–8 months): If harvested early, when the leaves start to yellow but are still attached, the rhizomes will be lighter in color, softer, and more tender. These young rhizomes are often referred to as “baby turmeric” or “baby ginger”, and they have a milder flavor with a juicier texture, perfect for fresh use in teas, smoothies, or salads.
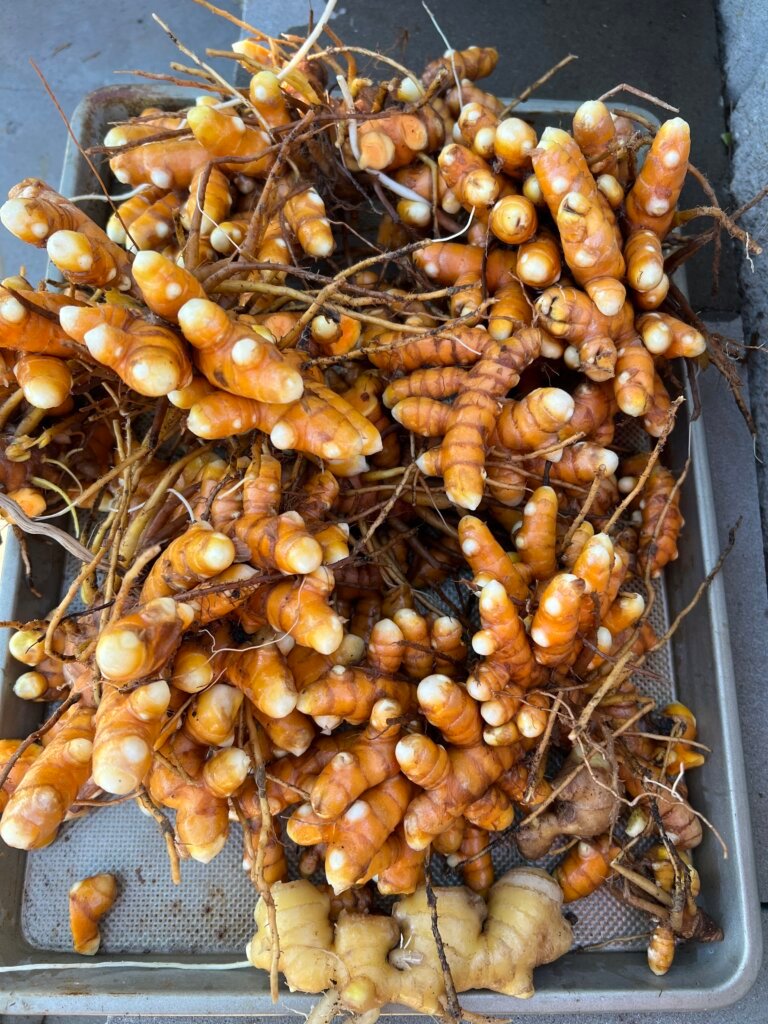
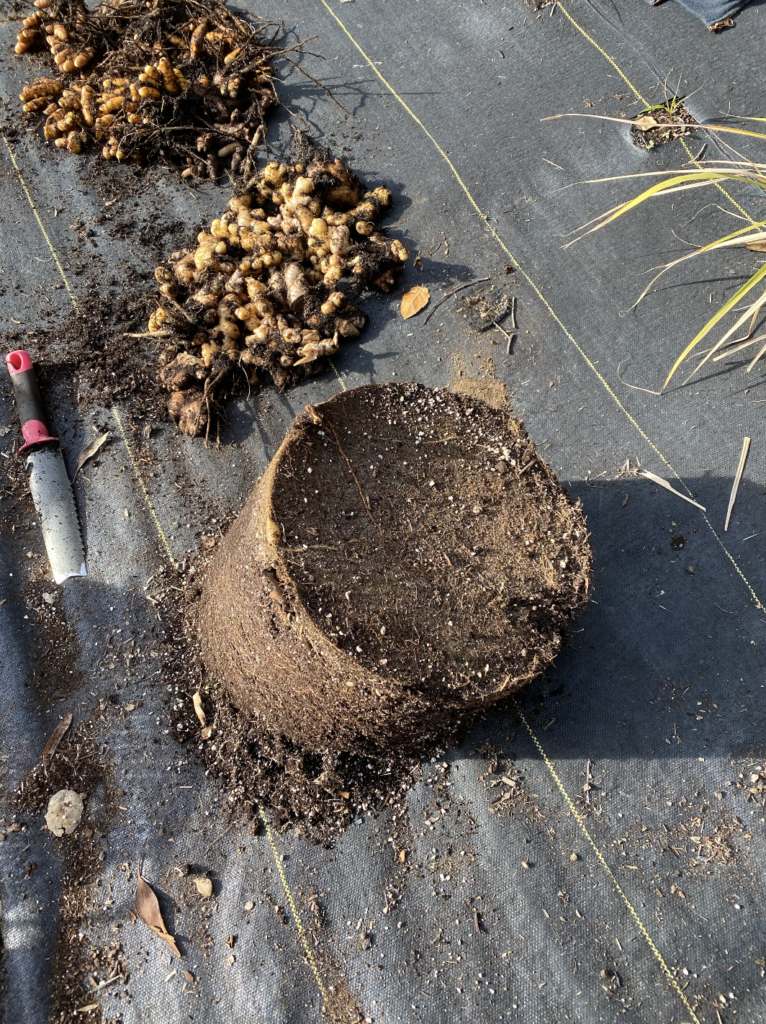
- Full Maturity (9–10 months): If you wait longer, allowing all the leaves to completely dry and fall off, the rhizomes develop a deeper color, stronger flavor, and thicker skin. This extra waiting period leads to a much bigger yield, as the rhizomes have had more time to grow. This last time, I let my turmeric stay in the ground longer than usual, and when I finally dug them up, I was amazed at the large harvest I got—just look at the pictures below!
How to Harvest Without Damaging Rhizomes
- Loosen the Soil First: Using a garden fork, shovel, or my favorite—Hori Hori knife, gently loosen the soil around the base of the plant. Be careful not to puncture the rhizomes, as damaged rhizomes don’t store well.
- Lift the Rhizomes Gently: Grab the base of the plant and pull gently but firmly while working your way around with a fork. Turmeric and ginger rhizomes grow horizontally, so dig a few inches away from the plant to avoid cutting into them.
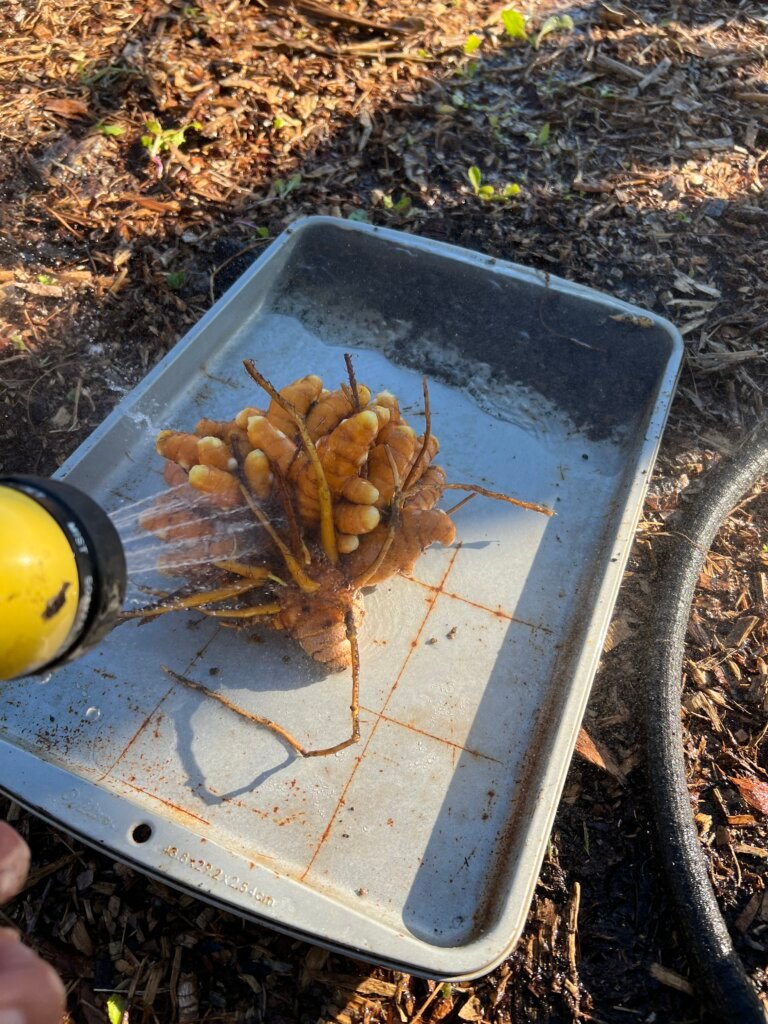
- Shake Off Excess Soil: Brush off loose soil and rinse the rhizomes with water to remove dirt. Avoid scrubbing too hard, as fresh turmeric and ginger skin is delicate.
- Air-Dry Before Storing: Let the rhizomes air-dry in the shade for a few hours to cure the skin before storing or processing. This prevents excess moisture, which can lead to mold.
Pro Tip: Can You Leave Some in the Ground?
If you live in a frost-free climate, you can leave a few rhizomes in the soil instead of harvesting everything. This way, they will sprout naturally again in spring, making your next season’s planting effortless!
What to Do After Harvest?
Once you have your freshly harvested turmeric and ginger, you can:
- Store them fresh: Keep them in a cool, dry place or refrigerate for short-term use.
- Freeze for long-term storage: Simply wash, dry, and freeze whole rhizomes—grate them directly from frozen when needed.
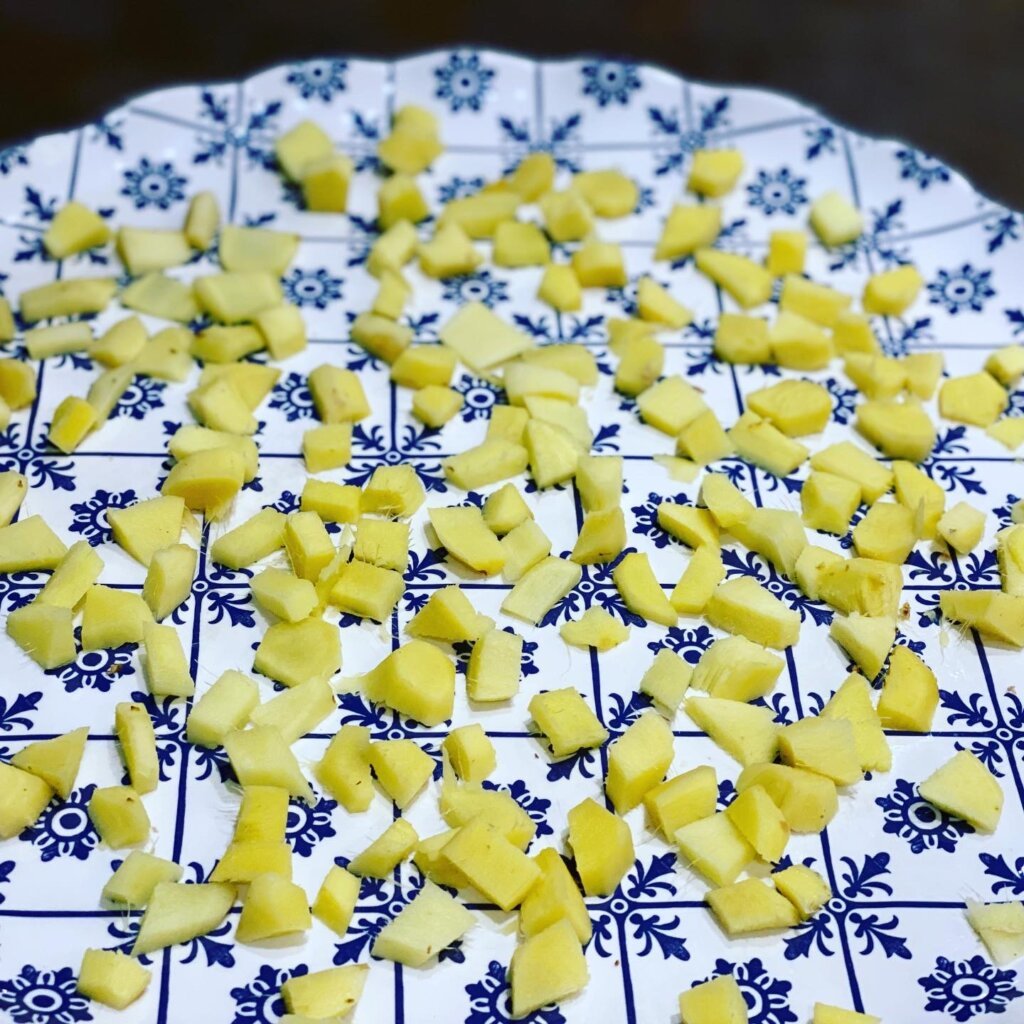
- Dry and powder them: Slice thinly and air-dry or dehydrate, then grind into homemade turmeric or ginger powder.
- Use them in cooking immediately! From curries and soups to teas and fermented pickles, fresh turmeric and ginger add depth and nutrition to any dish.
By harvesting at the right time and handling the rhizomes carefully, you’ll maximize both the yield and flavor of your homegrown turmeric and ginger!
How I Store and Use My Homegrown Turmeric and Ginger
Since turmeric and ginger take nearly a year to mature, I’ve experimented with different storage methods to keep them fresh for as long as possible. A good harvest means I need to store enough to last at least 10 months, ensuring I have plump, tender rhizomes ready to use until the next growing season. Store-bought ginger isn’t always fresh or high quality, so I prefer to keep my own harvest fresh rather than relying on supermarket options. Over time, I’ve tried several methods with mixed results:
Fresh Storage Methods
- Freezing (Best for Retaining Freshness)
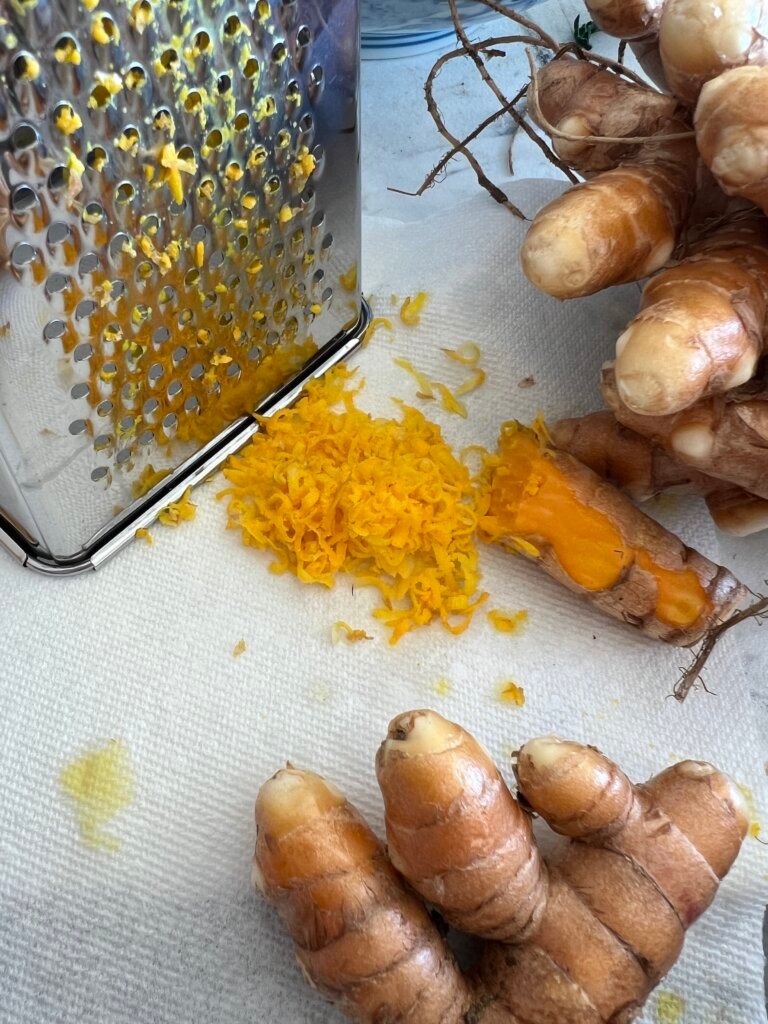
- I freeze whole turmeric and ginger rhizomes, which allows me to grate them fresh directly into dishes like salads, stews, and smoothies.
- Freezing locks in their vibrant color and flavor without losing potency.
- To use, I simply take a frozen piece and grate it with a Microplane—no need to thaw!
- Refrigeration in Paper Bags (Best for Short-Term Freshness)
- I wrap turmeric and ginger in a paper towel first, then place them in a paper bag in small batches inside the fridge.
- This method keeps them fresh for a few months before they start to dry out.
- Storage in Dried Coco Coir (Mixed Results)
- I placed my rhizomes in a small box filled with dried coco coir, sealed it, and stored it in my cool pantry.
- While some stayed fresh, others started sprouting, and some shriveled and dried out over time.
Long-Term Preservation Methods
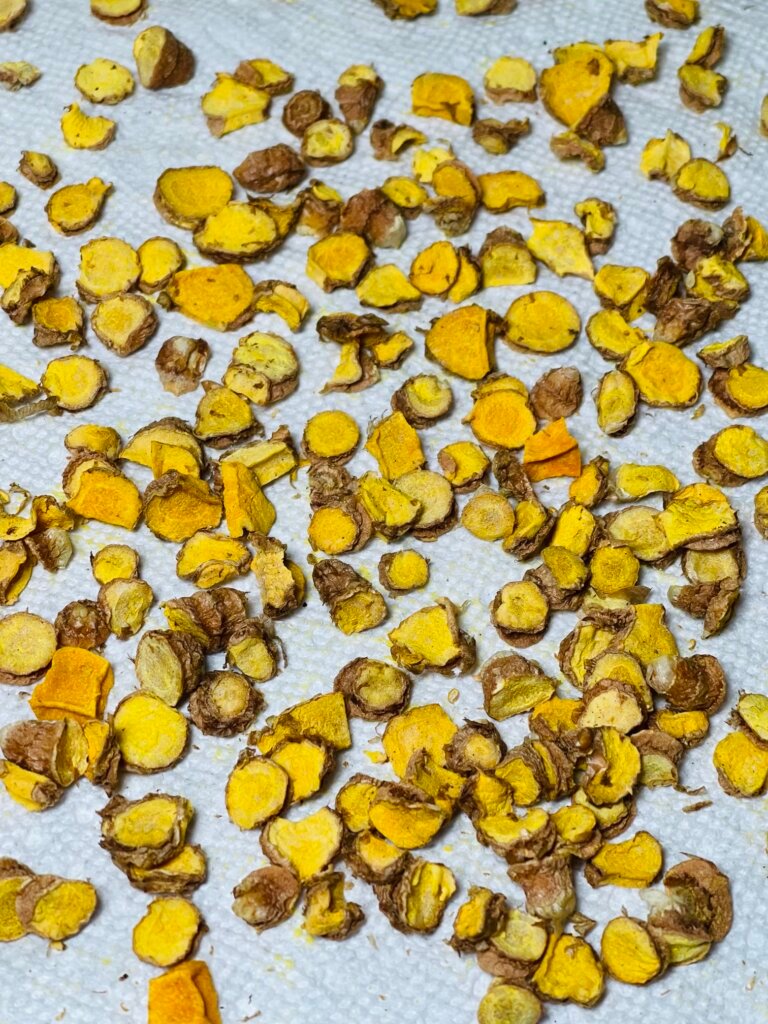
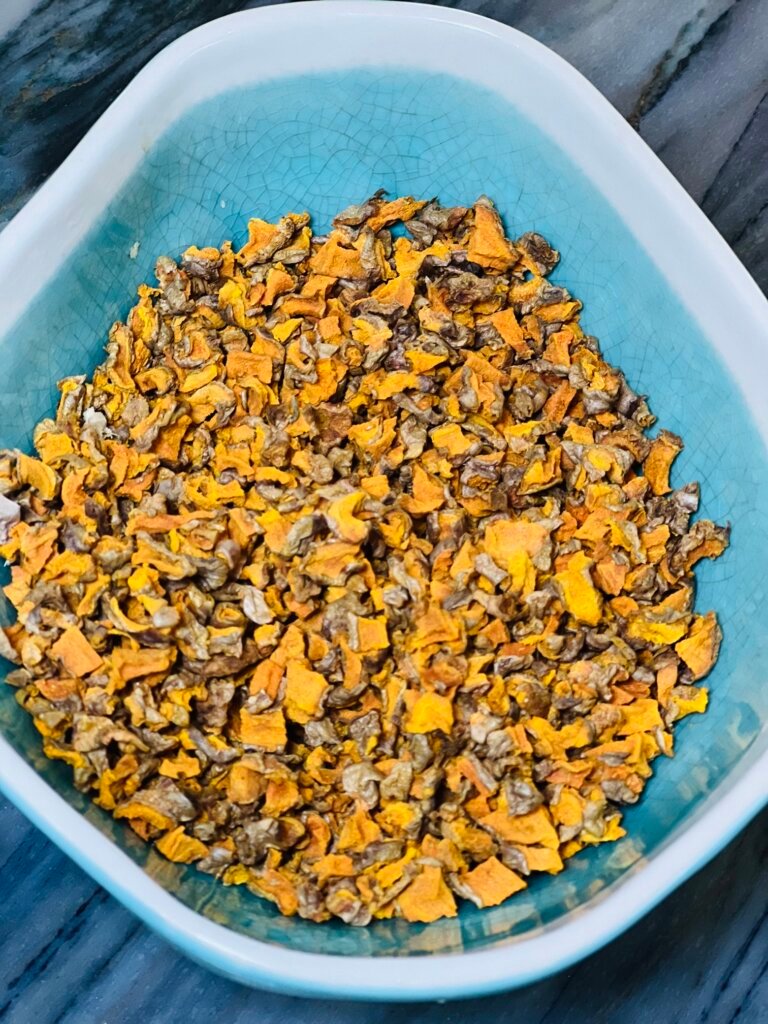
- Air-Drying (Best for Tea & Infusions)
- I slice the rhizomes thinly and let them air-dry in a warm, shaded area.
- Once completely dried, I store the slices in a glass jar, where they last up to a year.
- These dried turmeric and ginger pieces are perfect for brewing tea or adding to broths and soups.
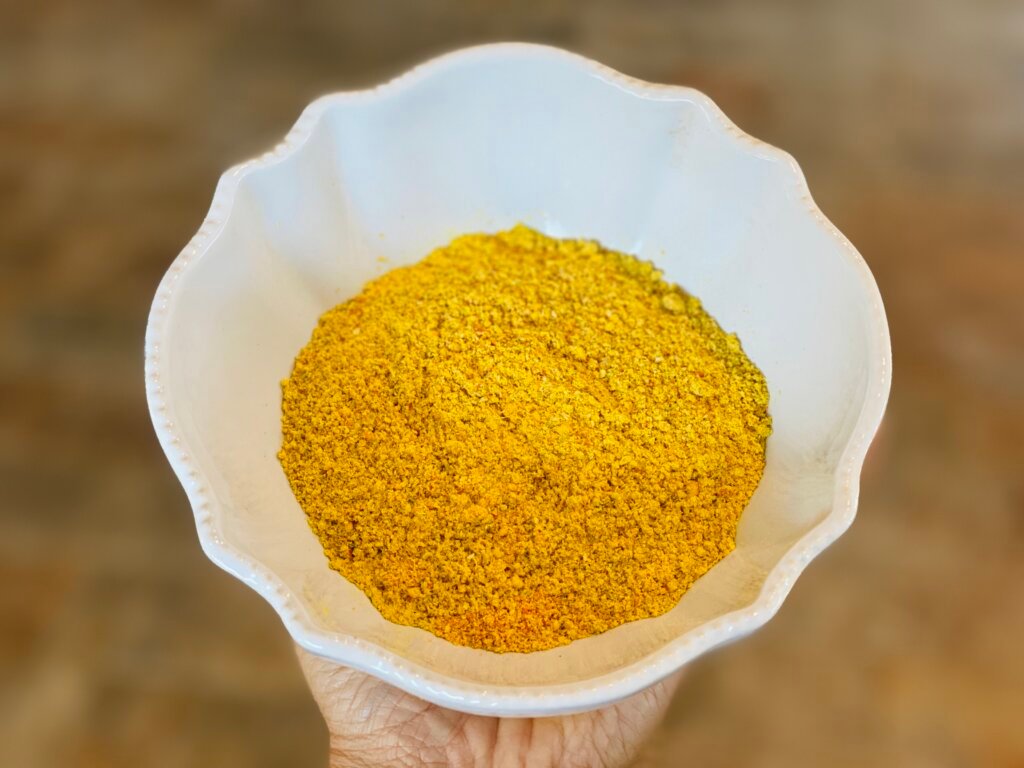
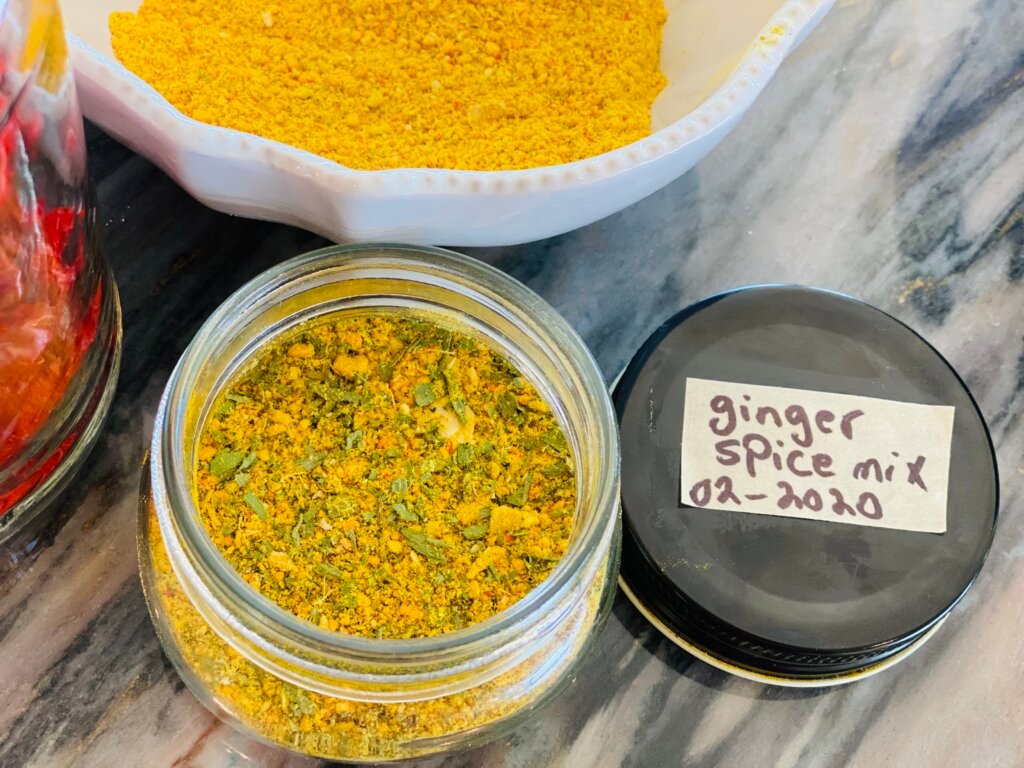
- Powdering (Best for Cooking & Spice Blends)
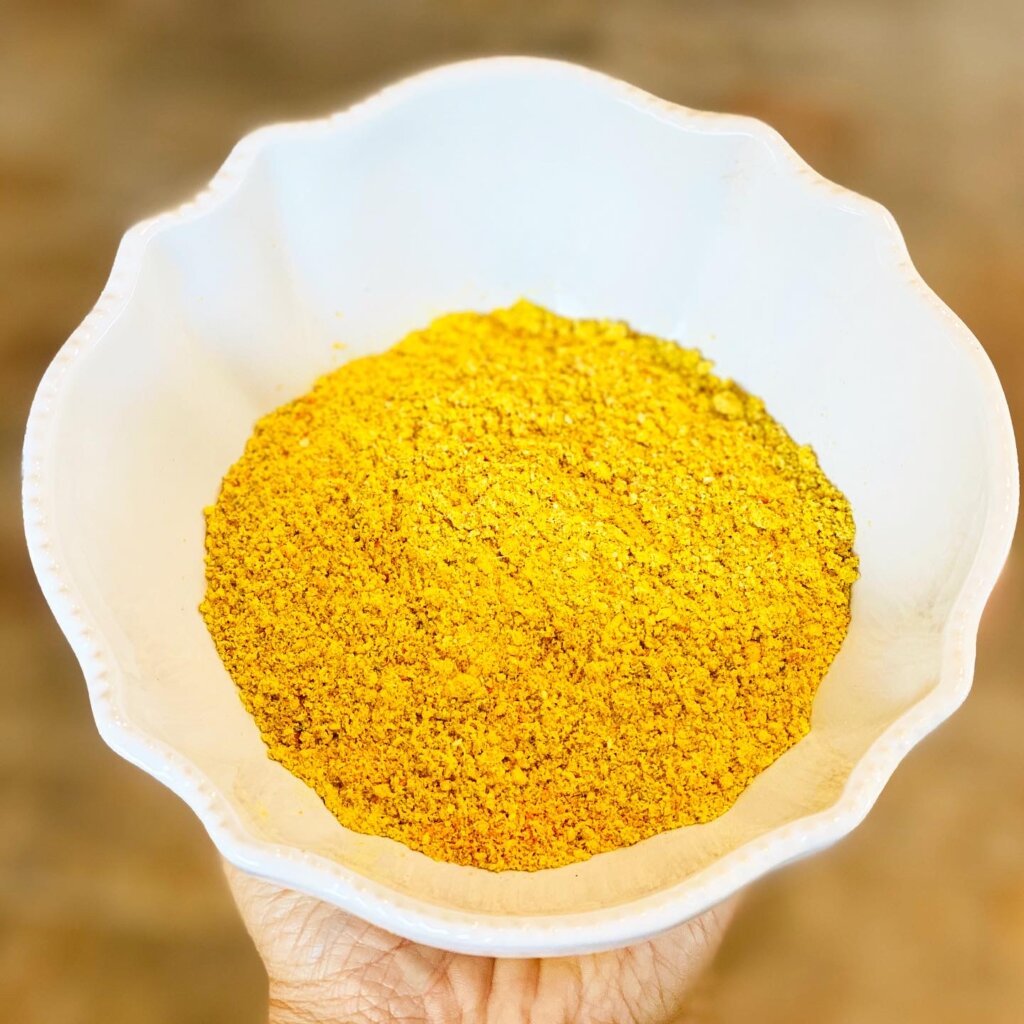
- To make homemade turmeric or ginger powder, I first air-dry the slices completely, then grind them into a fine powder using a spice grinder.
- Freshly ground turmeric powder has a stronger aroma and richer color than store-bought varieties, making it perfect for curries, spice blends, and marinades.
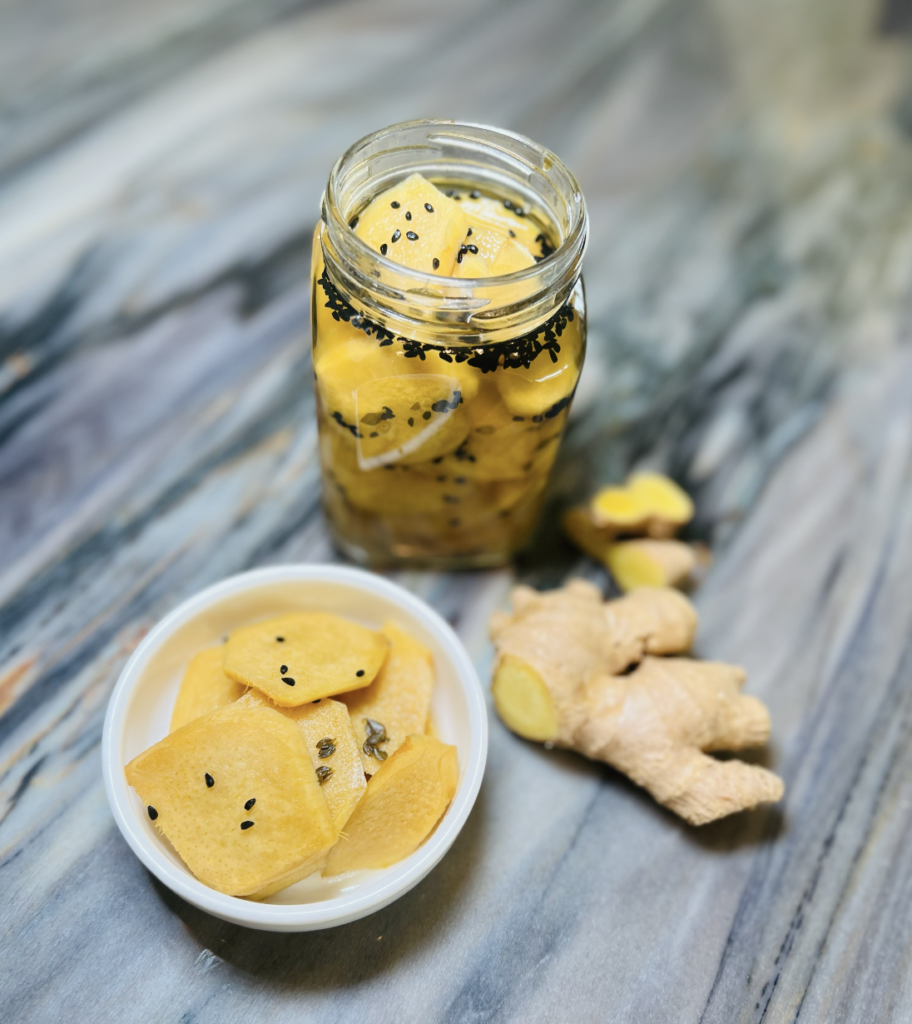
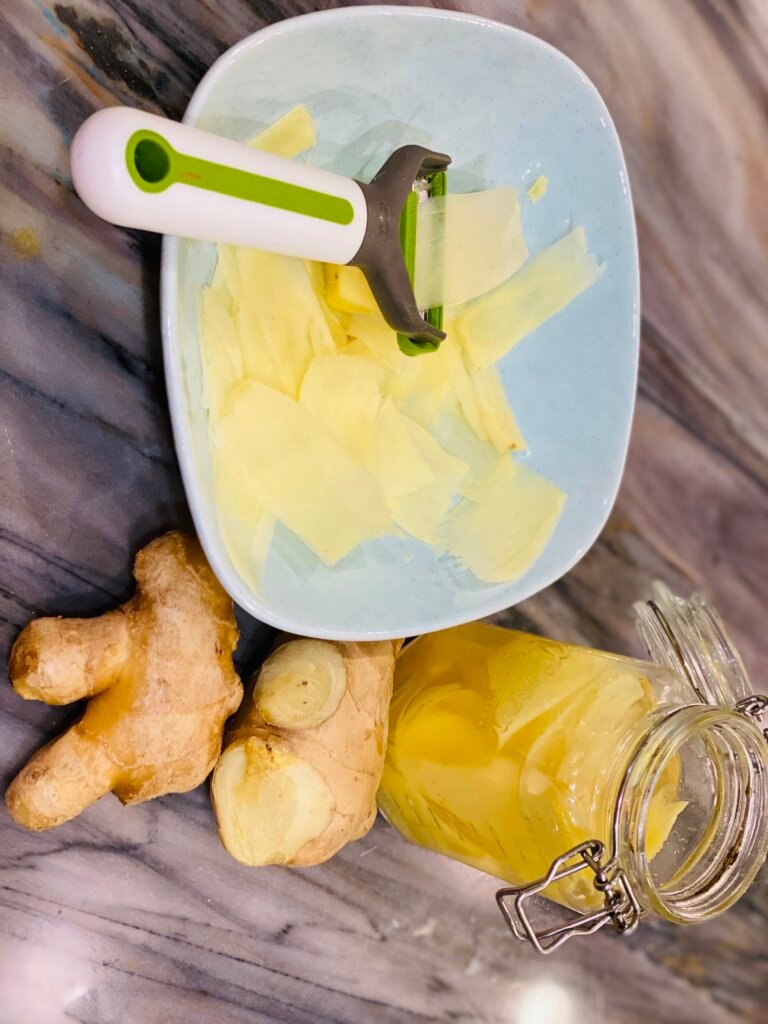
- Pickling Fresh Ginger (Best for Side Dishes)
- I love making pickles with fresh ginger, which lasts more than a year and is the perfect side dish for many meals.
- Pickled ginger adds a tangy, spicy kick that enhances the flavors of rice dishes, stir-fries, and salads.
By experimenting with these harvesting and storage methods, I can enjoy homegrown turmeric and ginger year-round, adding their fresh, vibrant flavor to my kitchen while benefiting from their incredible health properties. If you have other successful storage techniques, I’d love to hear them! 😊
Note: I don’t peel my ginger or turmeric most of the time before slicing, grating, or dehydrating. Since I know they are organically grown, a thorough wash is enough, and the drying process helps eliminate bacteria. Plus, keeping the skin enhances their strong flavor. However, feel free to peel them before drying if you prefer—just use a knife or spoon to strip down the skin.


How to Use Turmeric and Ginger in Cooking
Turmeric and ginger are not just powerful medicinal rhizomes—they are also essential ingredients in cuisines around the world. Their warm, earthy, and slightly spicy flavors enhance both savory and sweet dishes, adding depth, color, and health benefits. Whether fresh or dried, these versatile spices can transform everyday meals into something extraordinary.
Cooking with Fresh Turmeric and Ginger
Fresh turmeric has a milder, more vibrant flavor compared to its dried form, while ginger has a pungent, slightly sweet heat that complements a wide range of dishes. Here are some of the best ways to use them:
1. Soups & Stews
- Finely grate or slice turmeric and ginger into broths, lentil soups, or vegetable stews for a boost of warmth and immune-supporting properties.
- In Persian cuisine, turmeric is a staple in stews (khoresh), lending its golden color and deep flavor to dishes served with rice.
2. Rice Dishes
- Turmeric is often used in Persian and Middle Eastern rice dishes for its aromatic and vibrant effect.
- Try adding a pinch of turmeric to basmati rice while cooking for a golden, fragrant side dish.
3. Curries & Stir-Fries
- Essential in Indian, Thai, and Southeast Asian curries, turmeric provides earthy depth, while ginger adds a spicy, aromatic zing.
- Freshly grated turmeric enhances coconut-based curries, while ginger lifts stir-fried vegetables, tofu, or meats.
4. Golden Milk & Teas
- Simmer fresh turmeric and ginger with milk (or plant-based milk), cinnamon, and black pepper to make golden milk, a traditional anti-inflammatory drink.
- Fresh ginger is excellent in herbal teas—simply steep slices in hot water for digestive relief and soothing warmth.
5. Smoothies & Juices
- Blend a small piece of turmeric and ginger into smoothies for a nutritional boost.
- They pair well with citrus fruits like oranges, pineapples, or mangoes for a refreshing, invigorating drink.
6. Pickled & Fermented
- Pickling turmeric and ginger enhances their flavor and extends their shelf life.
- Pickled ginger (gari) is a classic sushi accompaniment, while pickled turmeric adds a tangy kick to salads and sandwiches.
7. Baking & Desserts
- Ginger is a key ingredient in baked goods like gingerbread, cookies, and cakes.
- Turmeric can be added to puddings, warm spiced cakes, or even lattes for an earthy sweetness.
Using Dried or Powdered Turmeric and Ginger
If you have dried and powdered your turmeric and ginger, they can be used in a variety of ways:
✔ Sprinkle turmeric into roasted vegetables, rice, or quinoa for added depth and color.
✔ Mix turmeric and ginger powder into salad dressings, marinades, or yogurt-based dips.
✔ Use dried ginger in tea blends, chai, or homemade spice rubs for meats and vegetables.
✔ Incorporate turmeric into spice blends like garam masala or curry powder for deeper, richer flavors.
Medicinal & Health Uses
Beyond the kitchen, turmeric and ginger are widely used for their healing properties.
✔ Anti-inflammatory & Immune Support – Fresh or powdered turmeric and ginger enhance immunity when added to teas or warm water with honey and lemon.
✔ Digestive Aid – Ginger is well-known for relieving nausea and improving digestion. Chew a small piece of fresh ginger or steep it in tea for an upset stomach.
✔ Cold & Flu Relief – A warm tea made with ginger, turmeric, honey, and black pepper can soothe sore throats and help fight off colds.
Whether fresh, dried, or powdered, turmeric and ginger are must-have staples in any kitchen. Their rich flavors, vibrant colors, and numerous health benefits make them incredibly versatile for everyday cooking and wellness routines. Experiment with different ways to incorporate them into your meals, and discover how these powerful rhizomes can elevate both flavor and health in your diet!

Marzi’s Homemade Recipes: How I Use My Homegrown Turmeric and Ginger
Growing my own turmeric and ginger has allowed me to experiment with fresh, homegrown ingredients in my cooking, creating flavorful dishes infused with their warm, earthy essence. Whether fresh, dried, or powdered, these rhizomes play an essential role in my recipes, and I love incorporating them into my everyday meals.
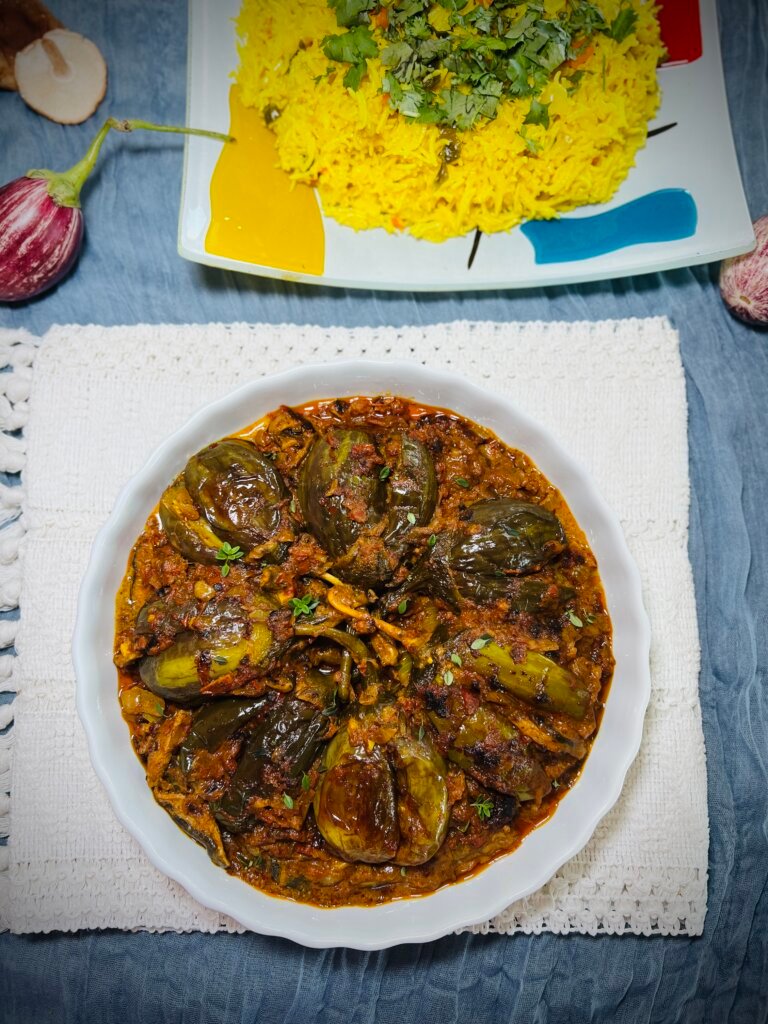
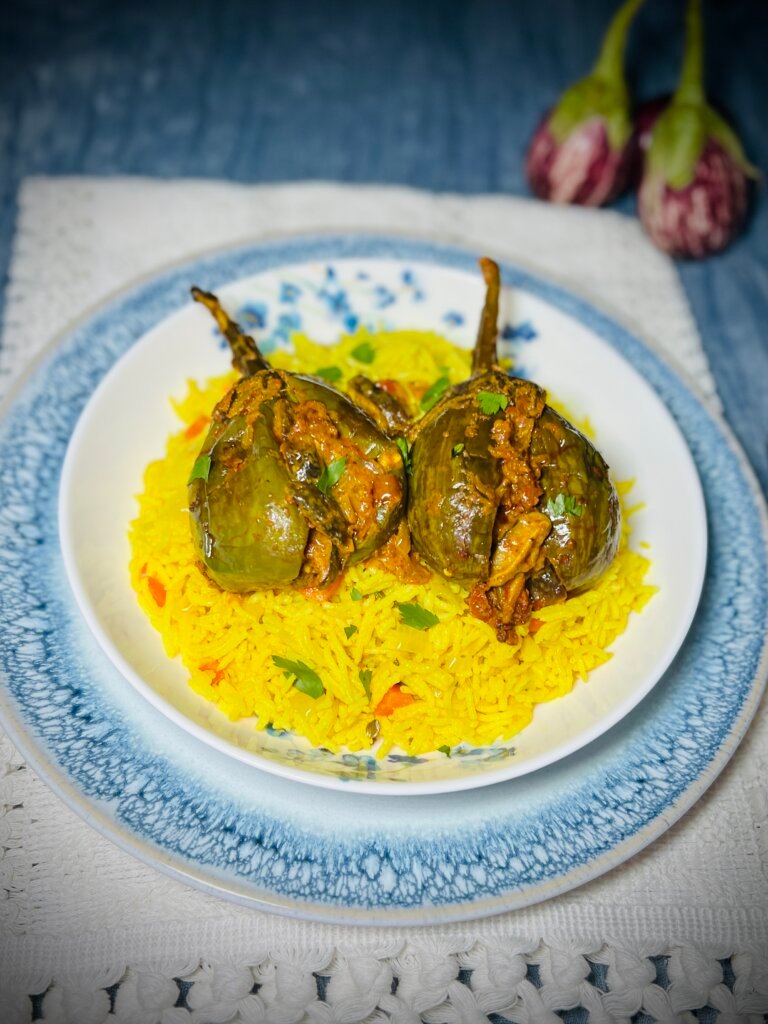
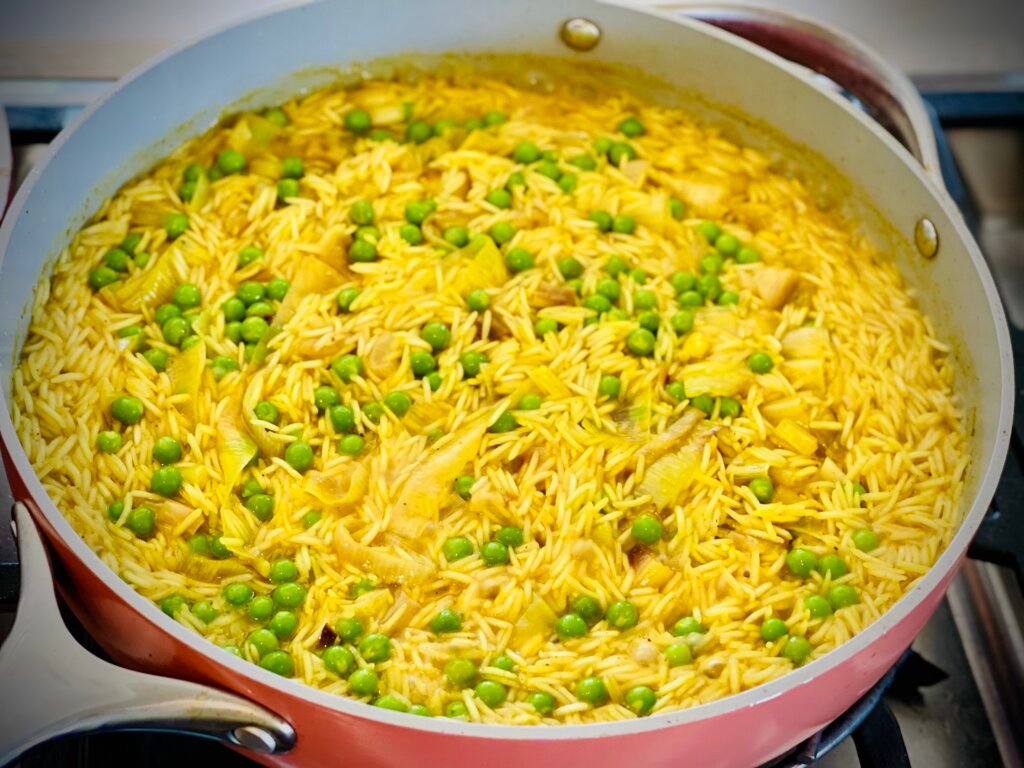
One of my favorite ways to use turmeric and ginger is in my Coconut Turmeric Rice (see recipe below), which is part of a recipe from my book, Marzi’s Mushroom Masterpieces. This recipe is featured in my Vegan Coconut Curry with Shiitake, Baby Eggplants & Turmeric Rice, where the fragrant turmeric rice perfectly complements the rich, spiced curry. If you love mushrooms as much as I do, be sure to check out my book, which features 75 vegan-friendly recipes, most of which are made with fresh ingredients from my own harvest. I’ve included pictures for every recipe so readers can see exactly how they turn out!
My Favorite Ways to Use Fresh Turmeric and Ginger

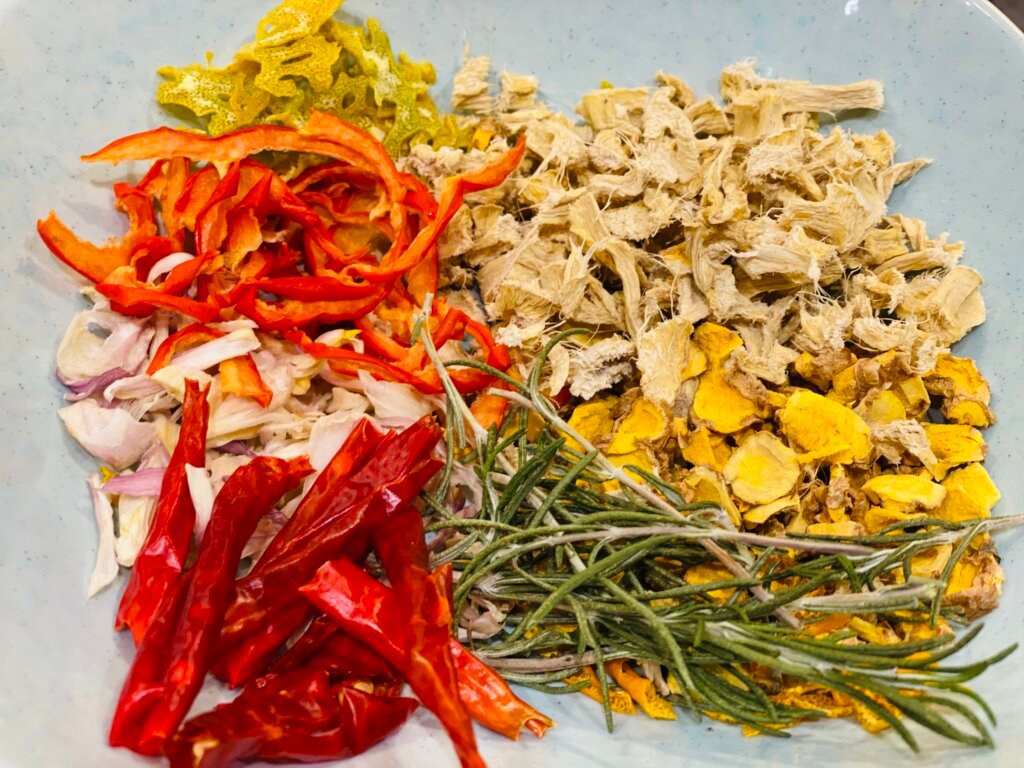


Besides cooking, I dehydrate some of my turmeric and ginger to use in hot teas. I also grind them into a fine homemade spice mix, which has become my go-to seasoning for many dishes. The combination of dried turmeric, ginger, and other aromatic spices makes a perfect blend for curries, soups, and roasted vegetables.
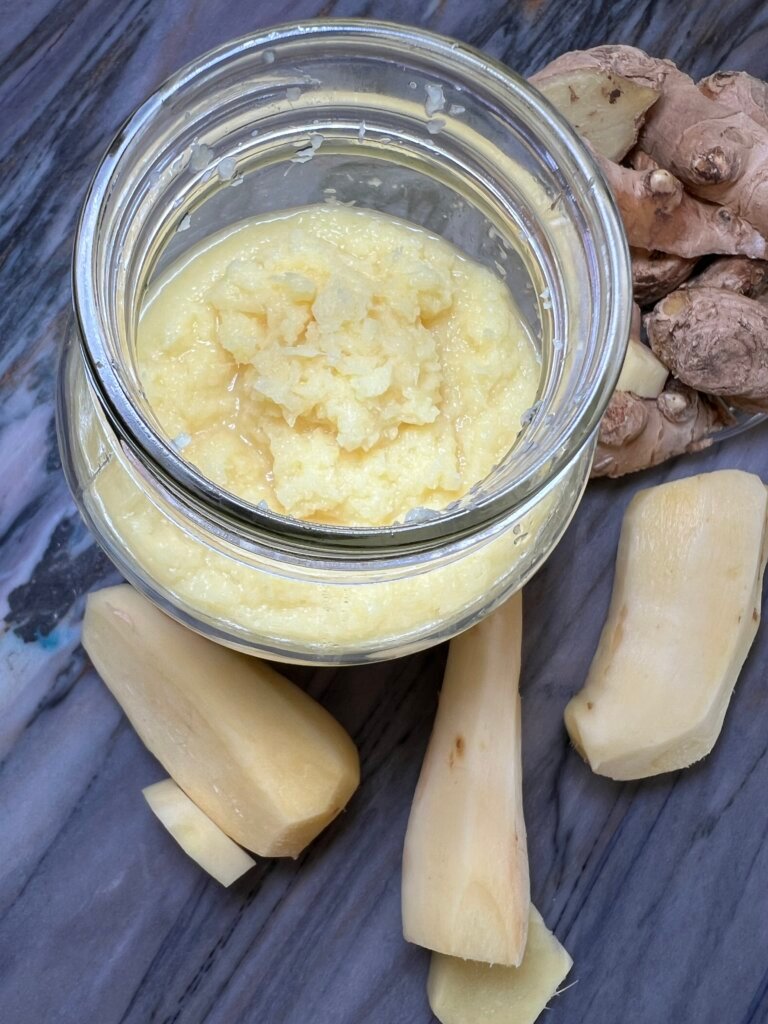
I also love making fresh ginger paste, which I store in small batches and use in my soups, sauces, and marinades. Another favorite is ginger-infused vinegar, which I make by soaking sliced ginger in homemade apple cider vinegar for a few weeks—this adds a tangy, spicy depth to salad dressings and stir-fries.
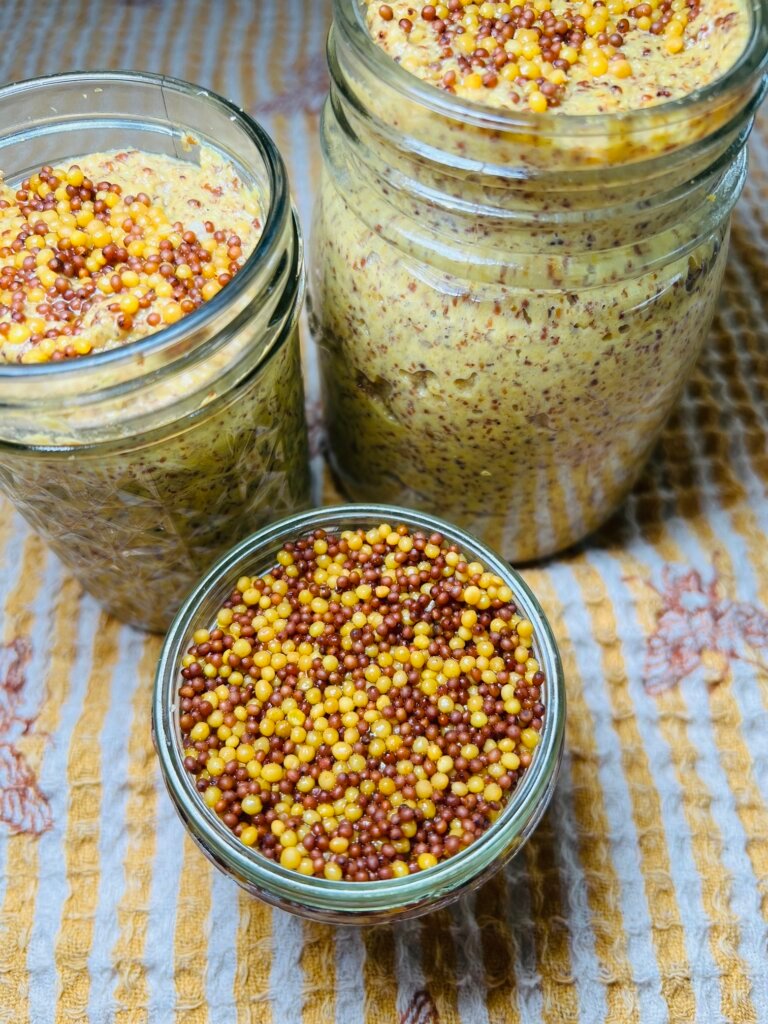
One of my most unique creations is mixing ginger paste with my homemade mustard. The combination creates a bold, slightly spicy condiment that pairs beautifully with roasted vegetables, sandwiches, or even as a dipping sauce for mushroom-based dishes.
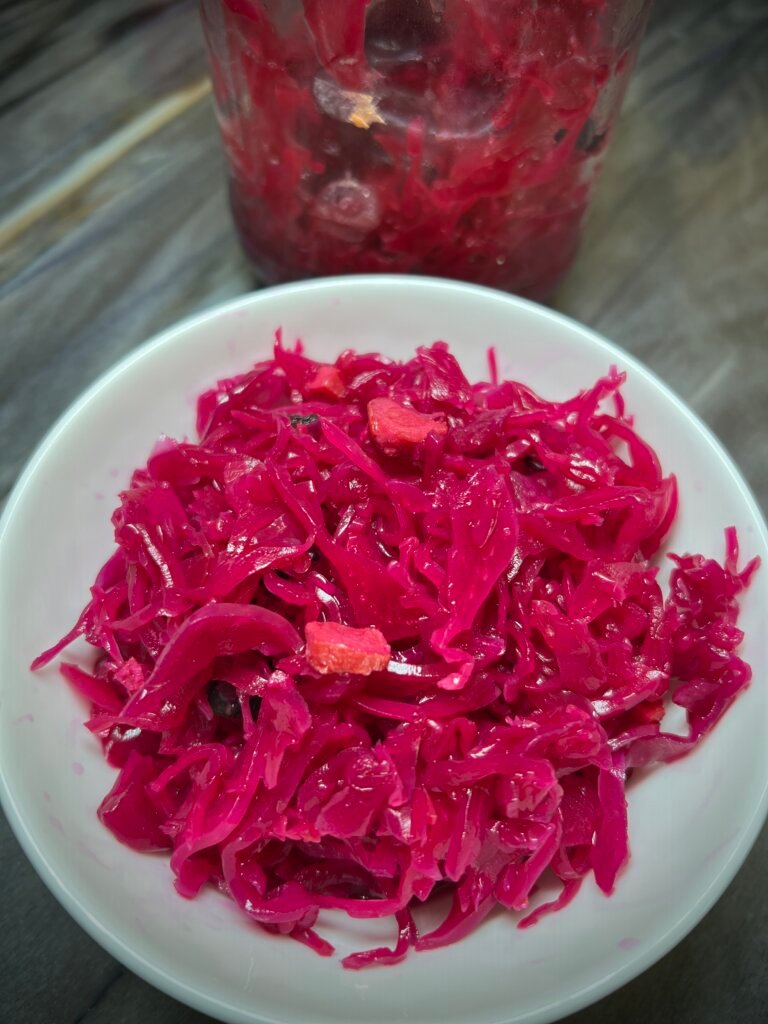
I also love making pickles with fresh ginger. These pickles last for more than a year and make the perfect side dish to complement a variety of meals, adding a tangy, spicy kick that enhances flavors beautifully.
Turmeric and ginger are truly versatile ingredients, and growing them myself has transformed the way I cook and create new recipes. Whether in savory dishes, teas, spice blends, or homemade condiments, these golden rhizomes are an essential part of my kitchen!

Coconut Turmeric Rice Recipe
Ingredients
- 2 cups basmati rice washed and drained
- 1 tbsp coconut oil
- 1 medium onion finely chopped
- 2 cloves garlic minced
- 1 tsp turmeric powder
- 2 green onions chopped
- 1 carrot diced
- 1 can coconut milk about 2 cups
- 2 cups vegetable or chicken broth
- 2 cups water
- 1½ tsp salt
- ¼ tsp cayenne pepper
- ¼ cup cilantro chopped
- Lime juice for garnish
Instructions
- Heat coconut oil in a large pot over medium-high heat. Sauté onion and garlic for 3 minutes until softened.
- Stir in turmeric, green onions, and carrots. Cook for 1 minute.
- Add the rice and stir until evenly coated.
- Pour in the coconut milk, broth, water, cayenne, and salt. Bring to a boil, then reduce heat to low, cover, and simmer for 50 minutes or until rice is tender.
- Remove from heat and keep covered for about 10 minutes.
- Fluff the rice with a fork, stir in cilantro, and add a squeeze of lime juice before serving.
Notes
The Joy and Reward of Growing Your Own Turmeric and Ginger
There is something truly special about harvesting turmeric and ginger that you have grown yourself. The process—from planting the rhizomes to watching their lush green leaves flourish—creates a deep connection to your food and garden.
For me, one of the most exciting moments was seeing my turmeric plant flower for the first time. Since turmeric rarely flowers outside of tropical climates, witnessing this bloom was a rewarding and unexpected surprise that deepened my appreciation for these resilient and beautiful plants.
Whether you’re an experienced gardener or just beginning your home-growing journey, I highly encourage you to try growing turmeric and ginger. Not only will they enhance your cooking with fresh, homegrown flavor, but they will also add a unique beauty to your garden. Their broad, tropical leaves create a lush, vibrant presence, and knowing that you nurtured these golden rhizomes from start to harvest makes every meal they flavor even more satisfying.
🌿✨ Happy gardening and happy harvesting! ✨🌿
Disclosure: This post may contain affiliate links to products (including Amazon). I’ll earn a small commission if you make a purchase through my link, at no additional cost to you! Regardless, I only link to products that I personally use on our homestead or believe in.
Looking for more ideas to use fresh ginger in cooking? Check this soup recipe i made with fresh ginger roots.
How to Make Easy Fragrant Indian Mulligatawny Soup
